Steps to Connect Shopify
Step 1: Open Shopify integration inside LazyChat
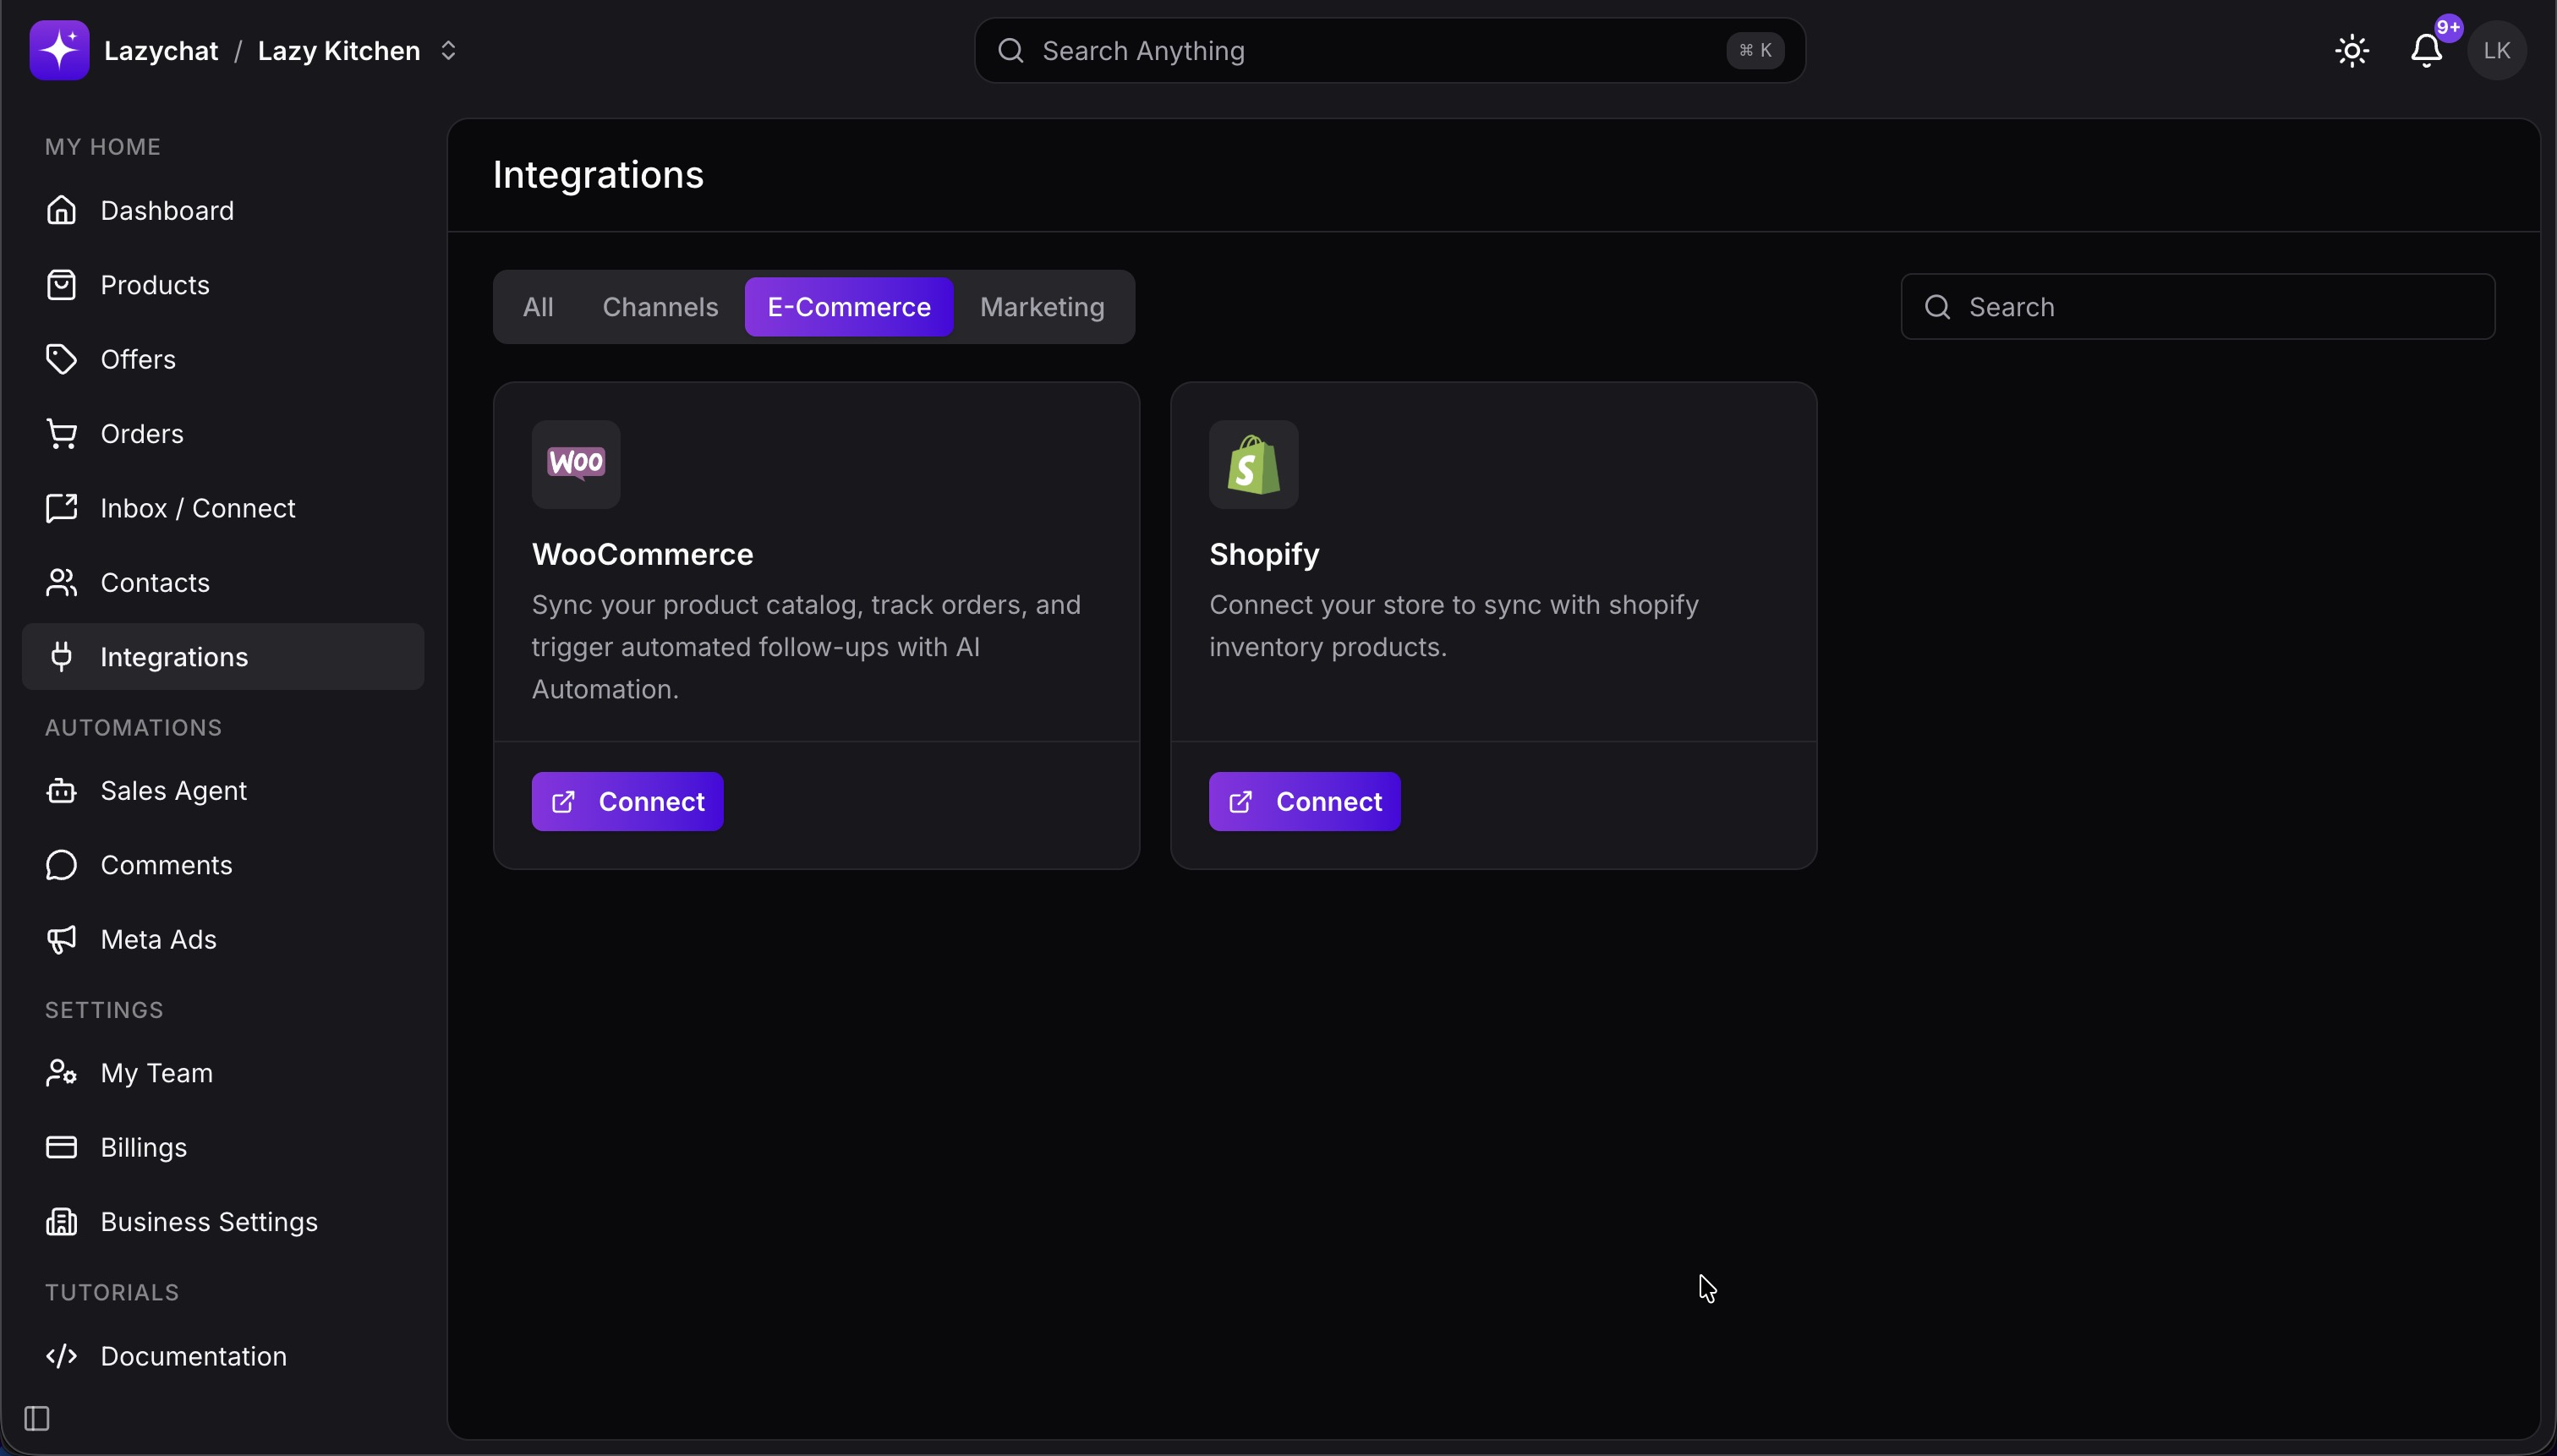
- Go to Integrations.
- Find the Shopify card.
- Tap Connect.
Step 2: Open the LazyChat app extension in Shopify App Store
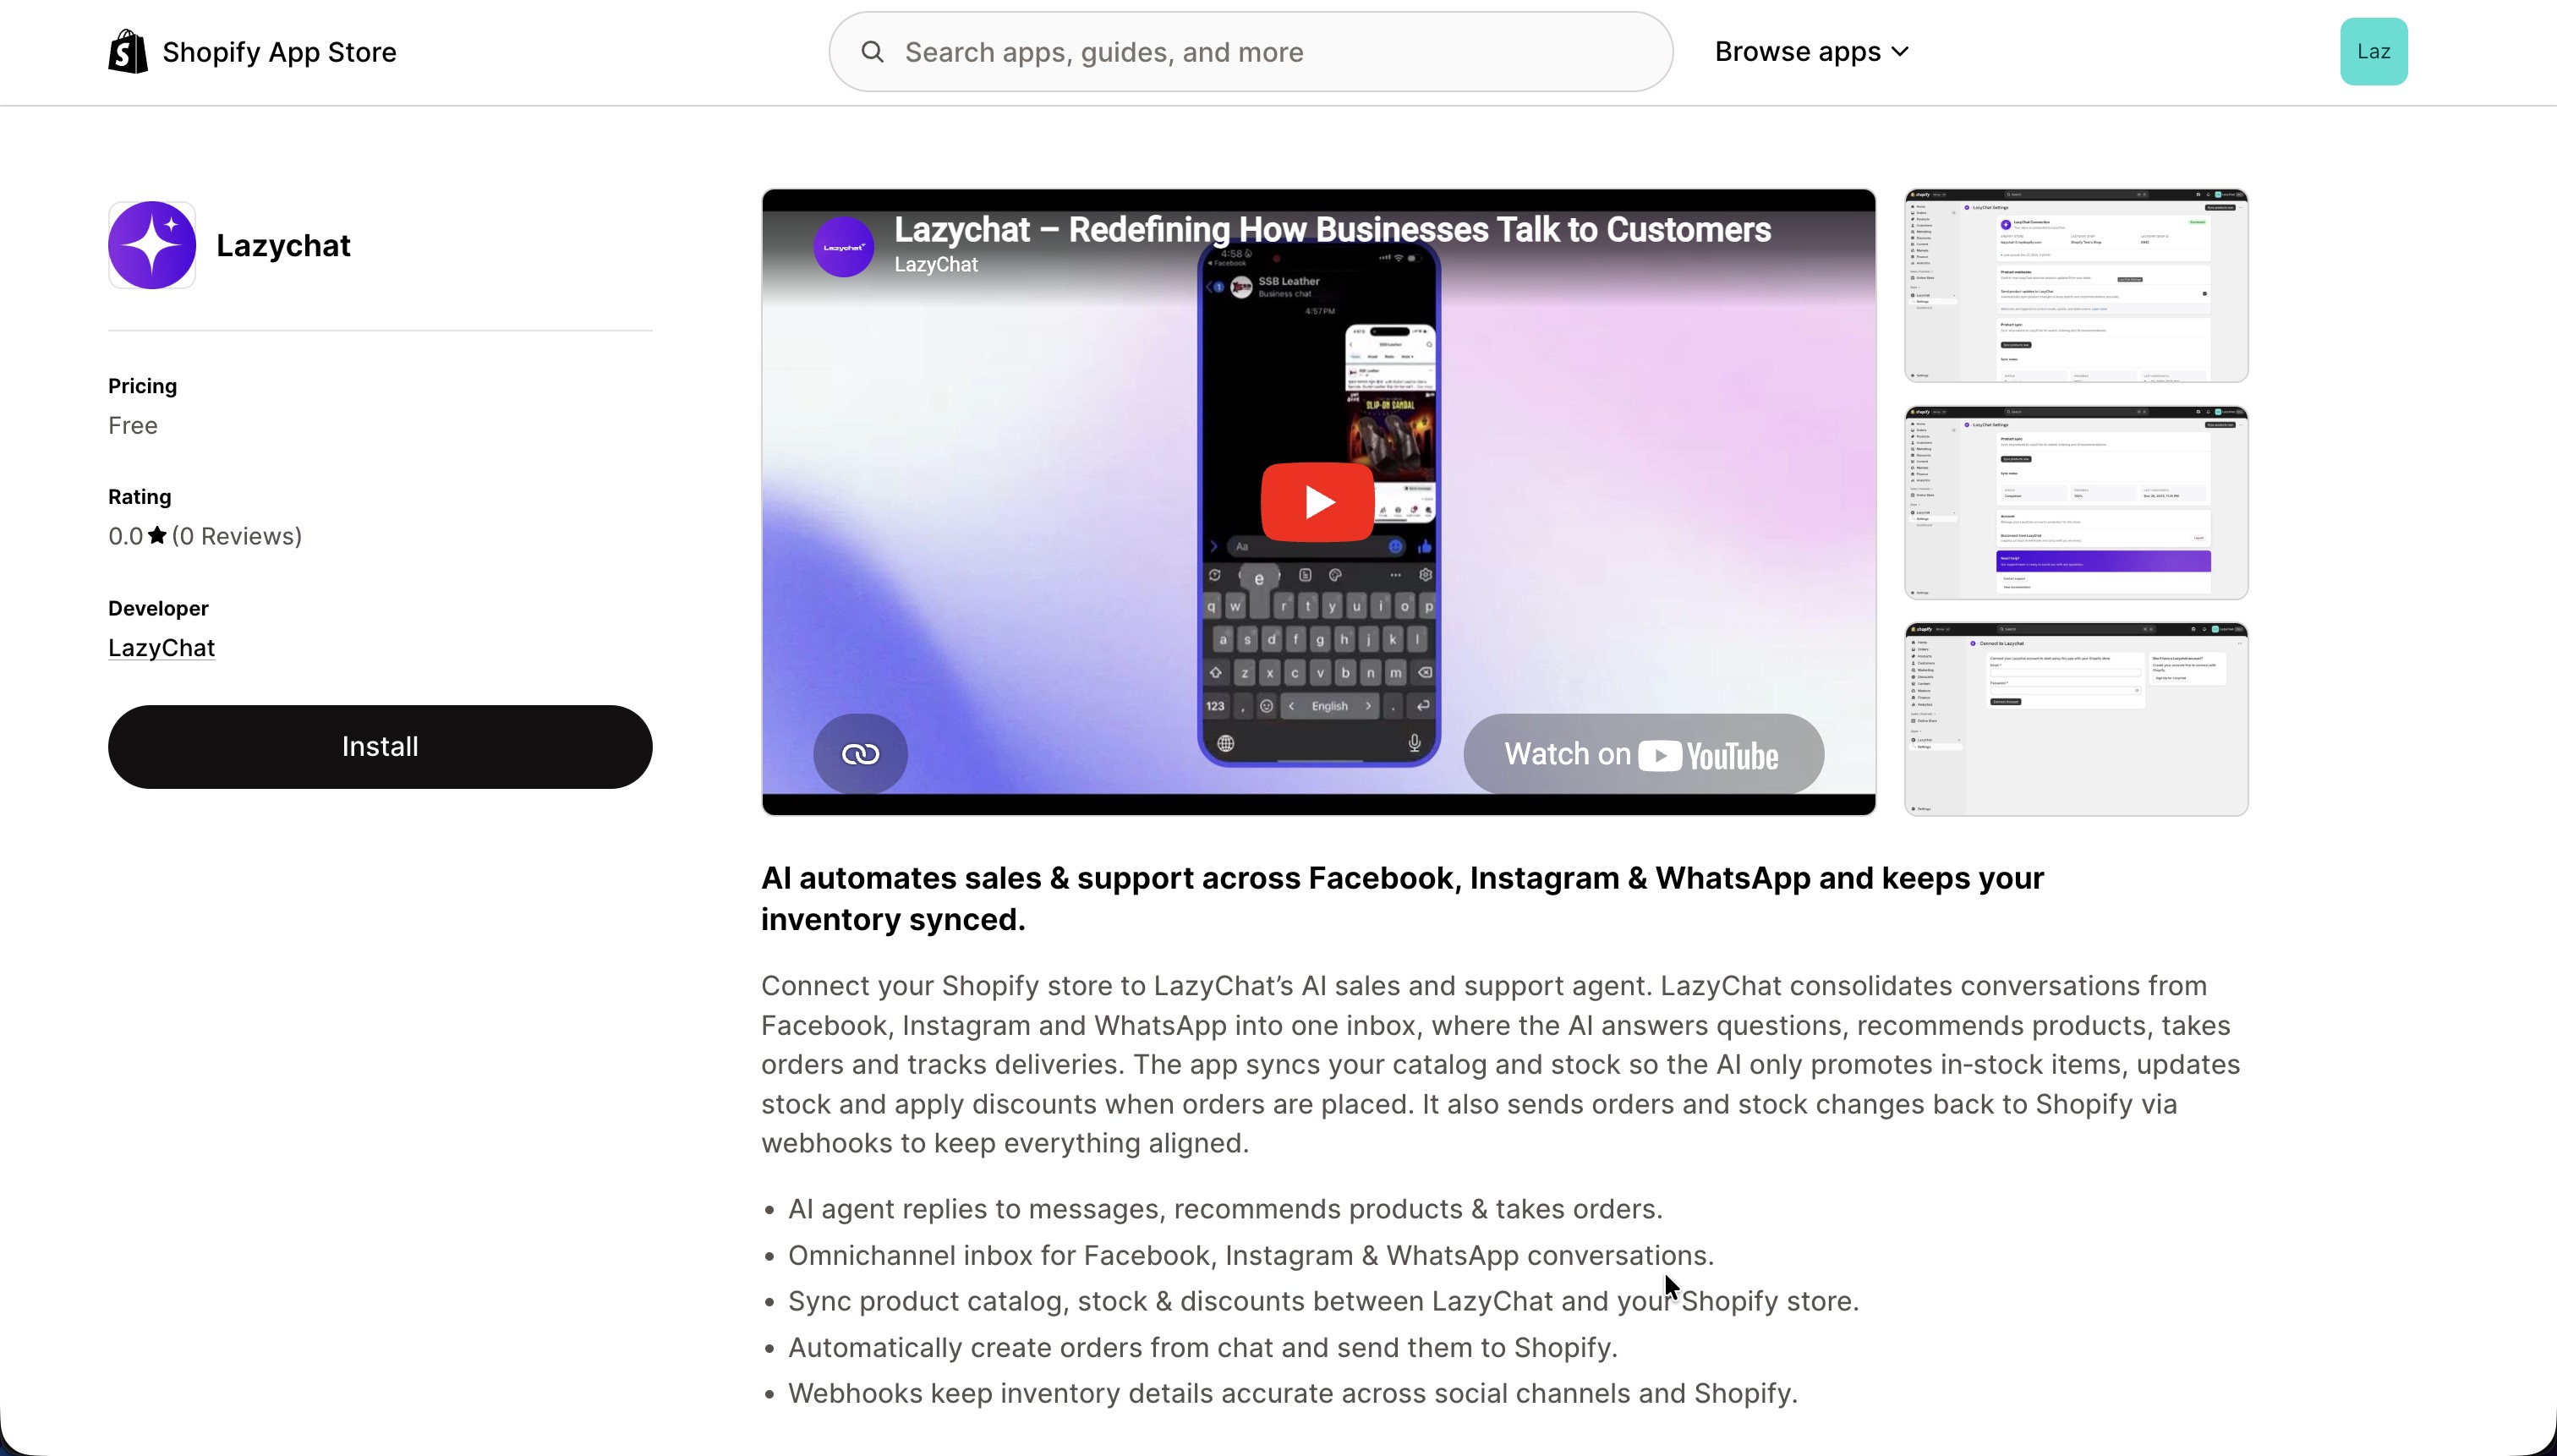
- You will be redirected to the Shopify App Store.
- Open the Lazychat extension.
- Tap Install
Step 3: Review app permissions
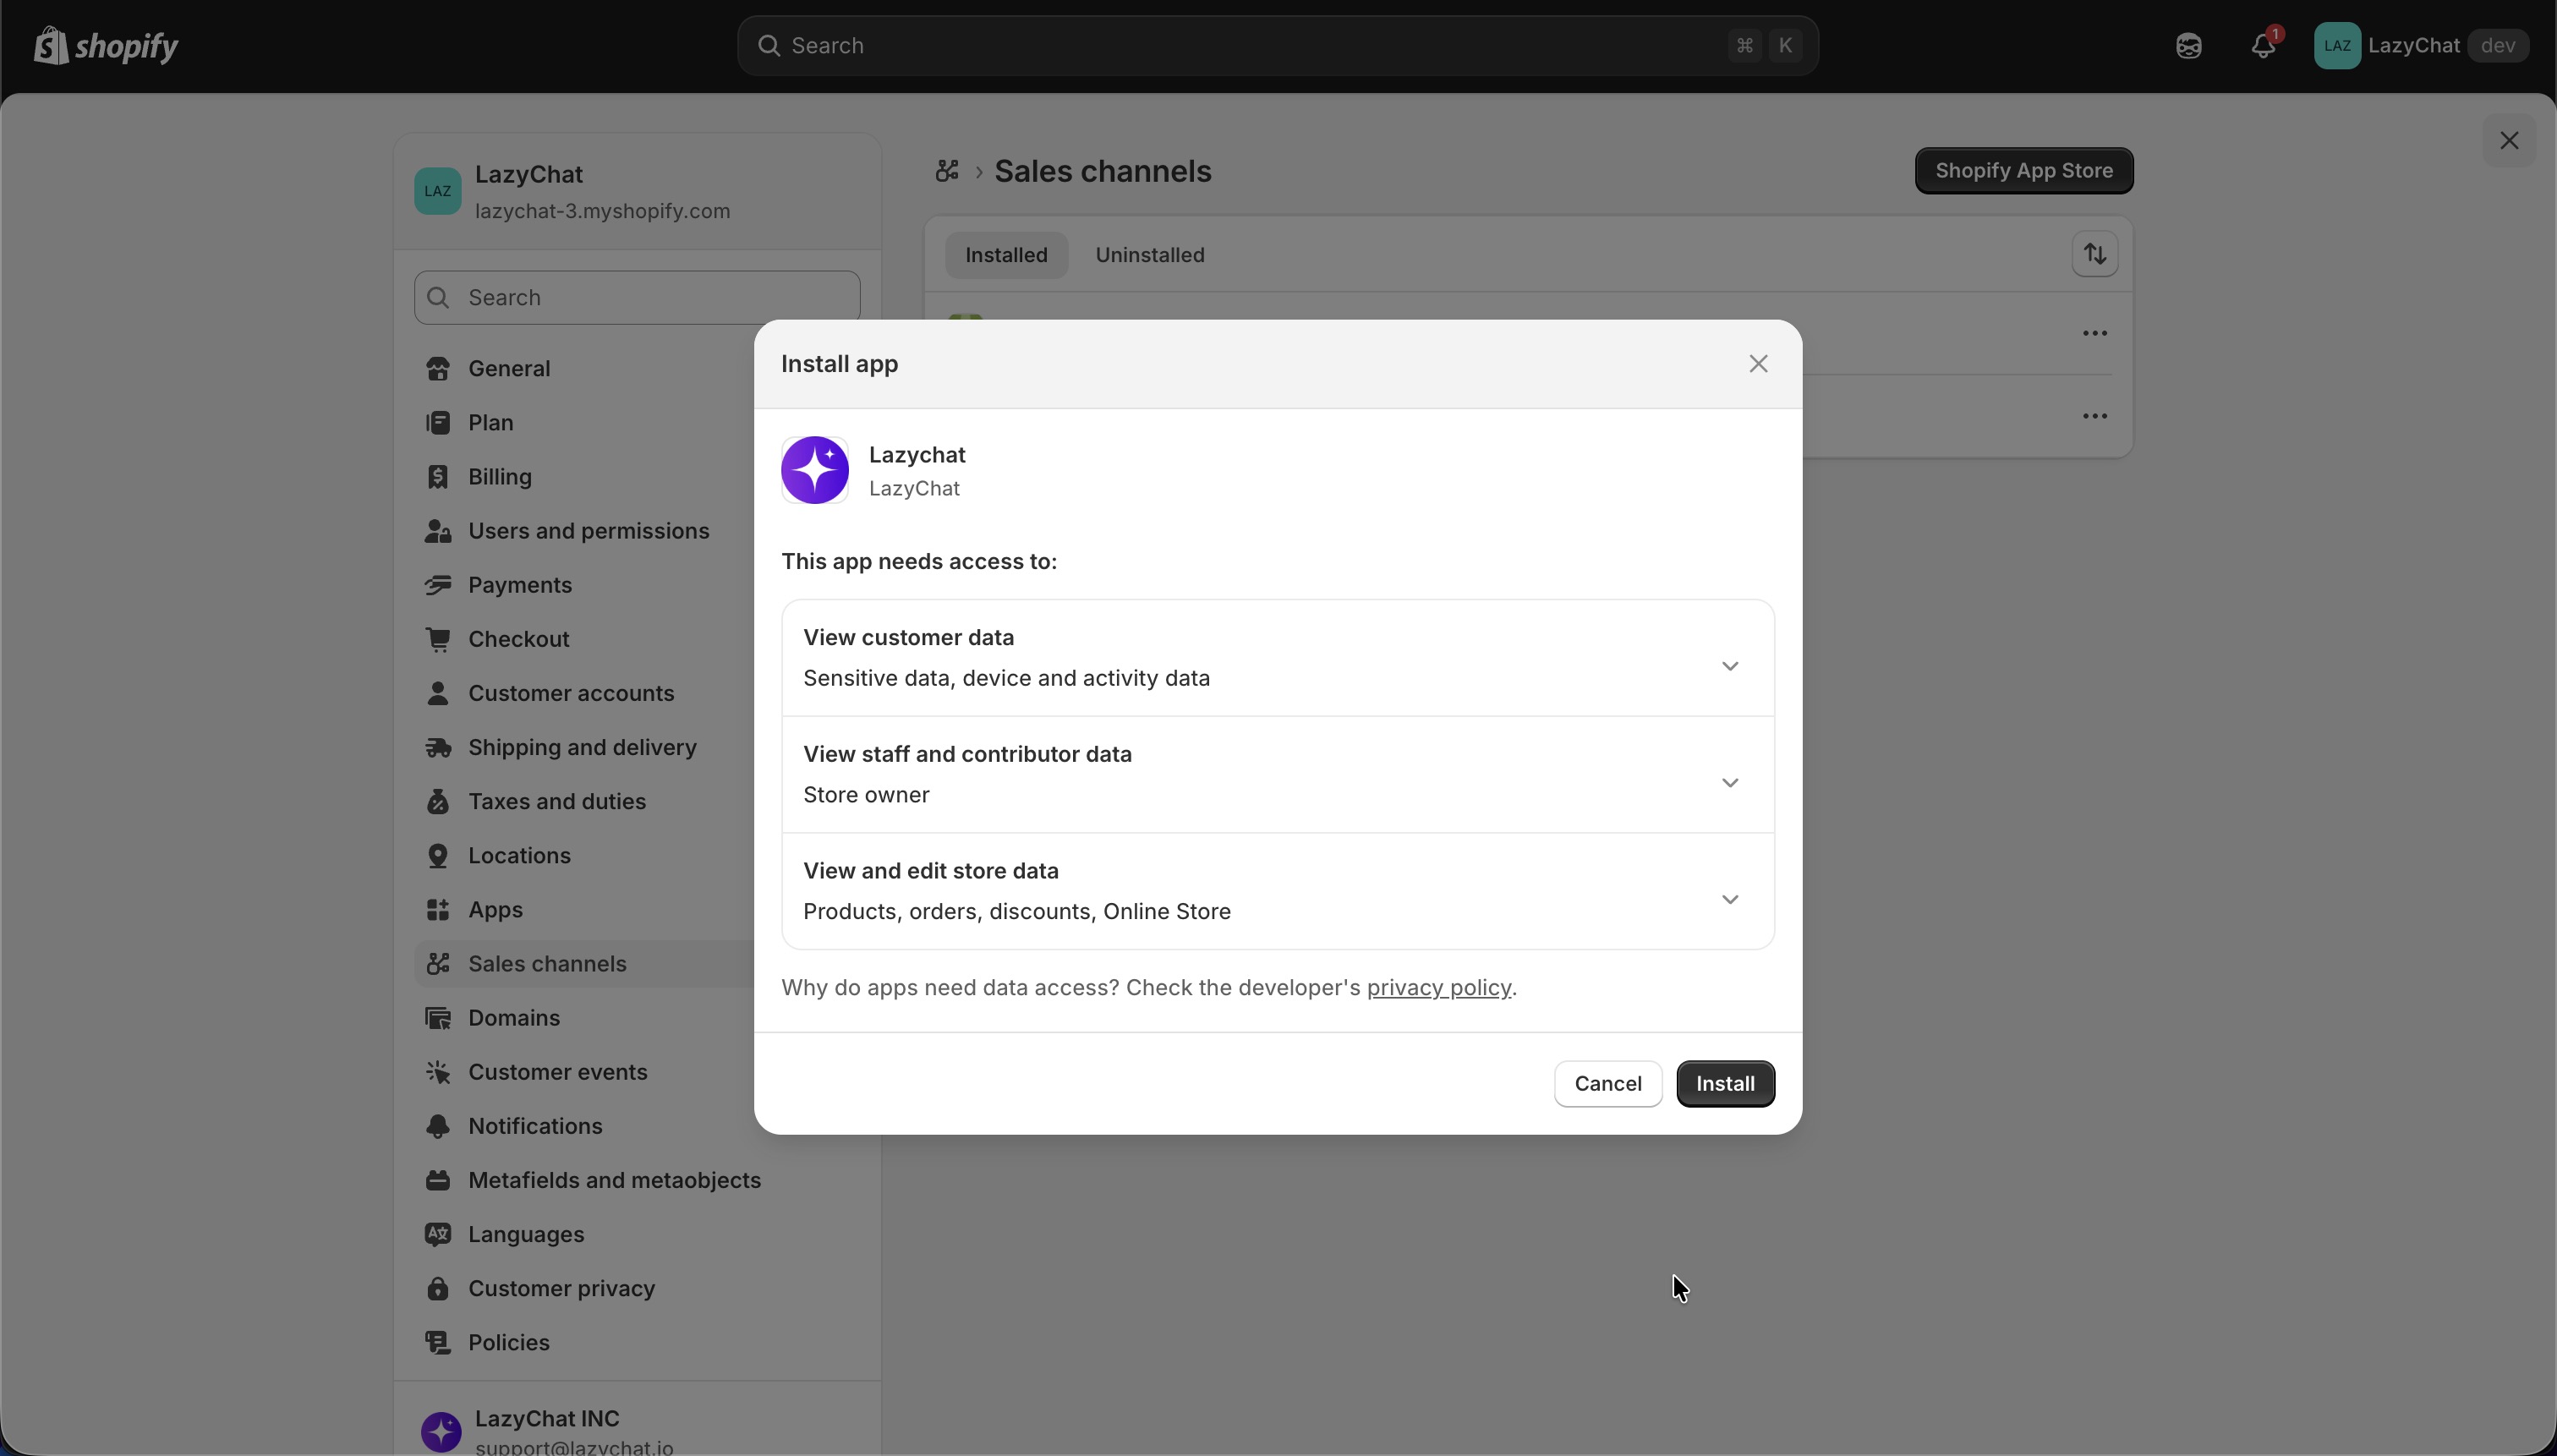 On the Install app screen, review the access requested by LazyChat, including:
- View customer data
- View staff and contributor data
- View and edit store data
Then tap Install.
Step 4: Connect your LazyChat account
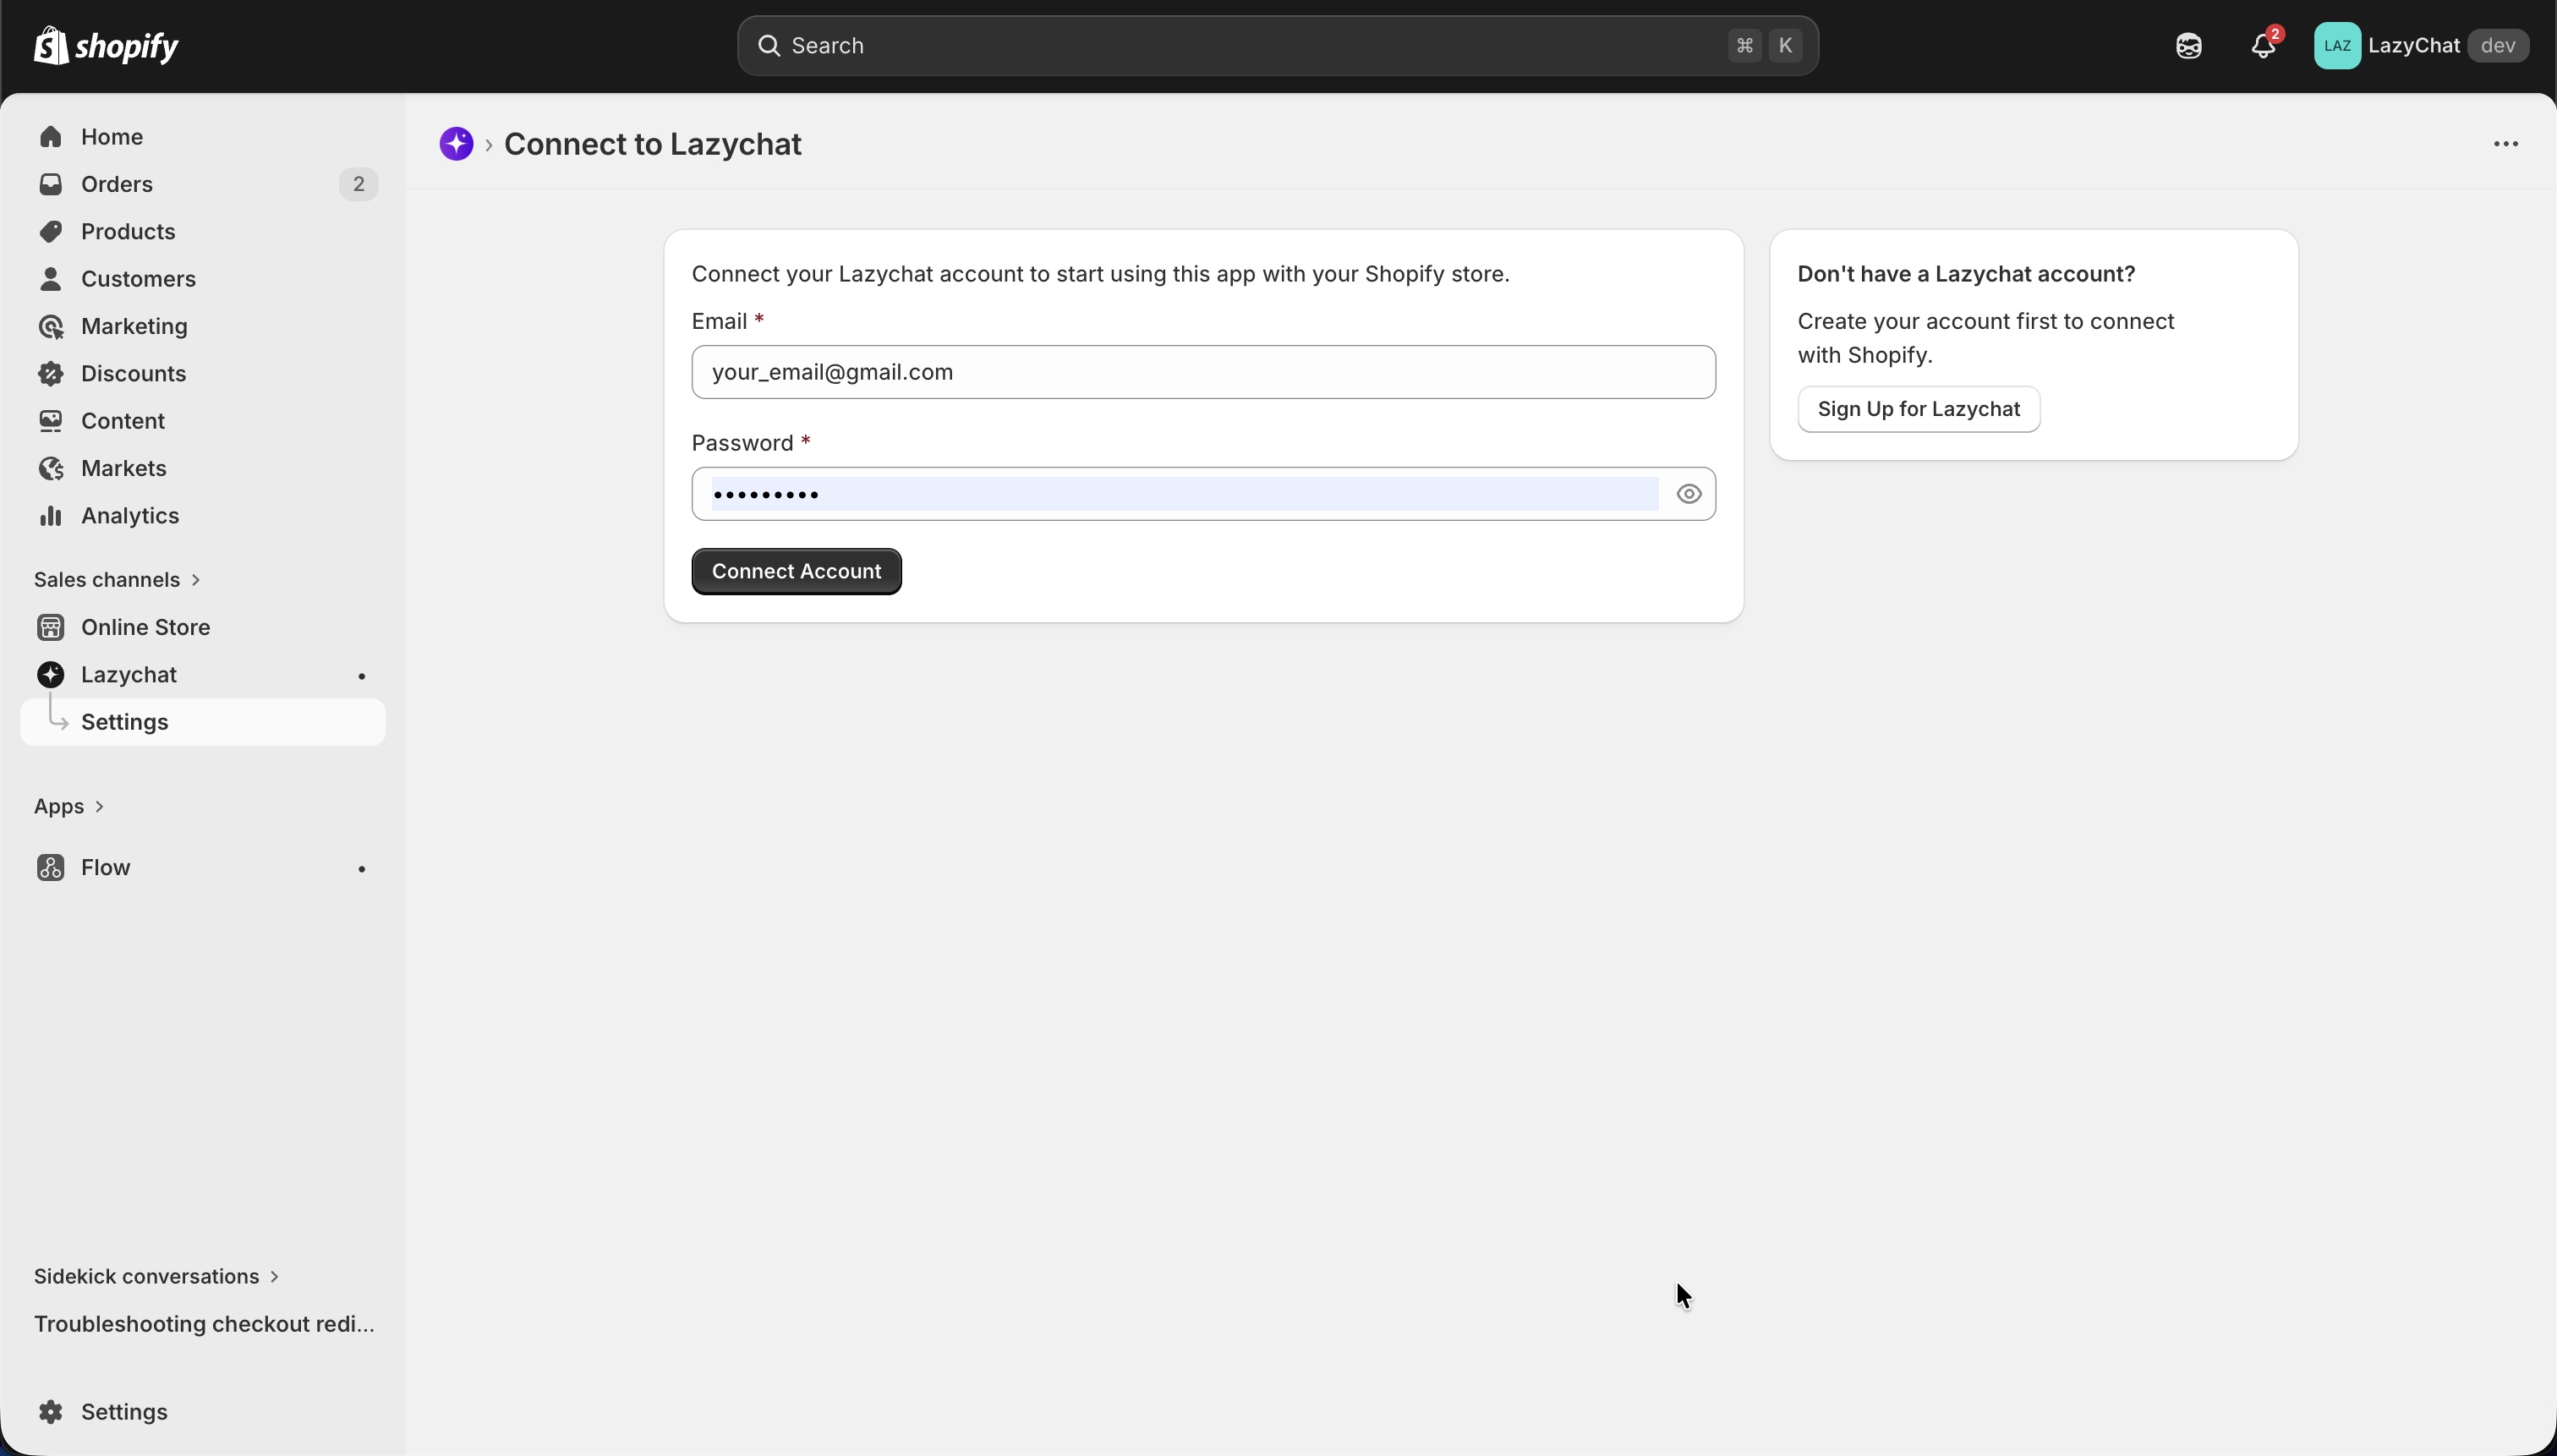 On the Connect to Lazychat screen:
- Enter your LazyChat Email
- Enter your LazyChat Password
- Tap Connect Account
If you do not have a LazyChat account yet, Create an account first.
Step 5: Select your LazyChat shop
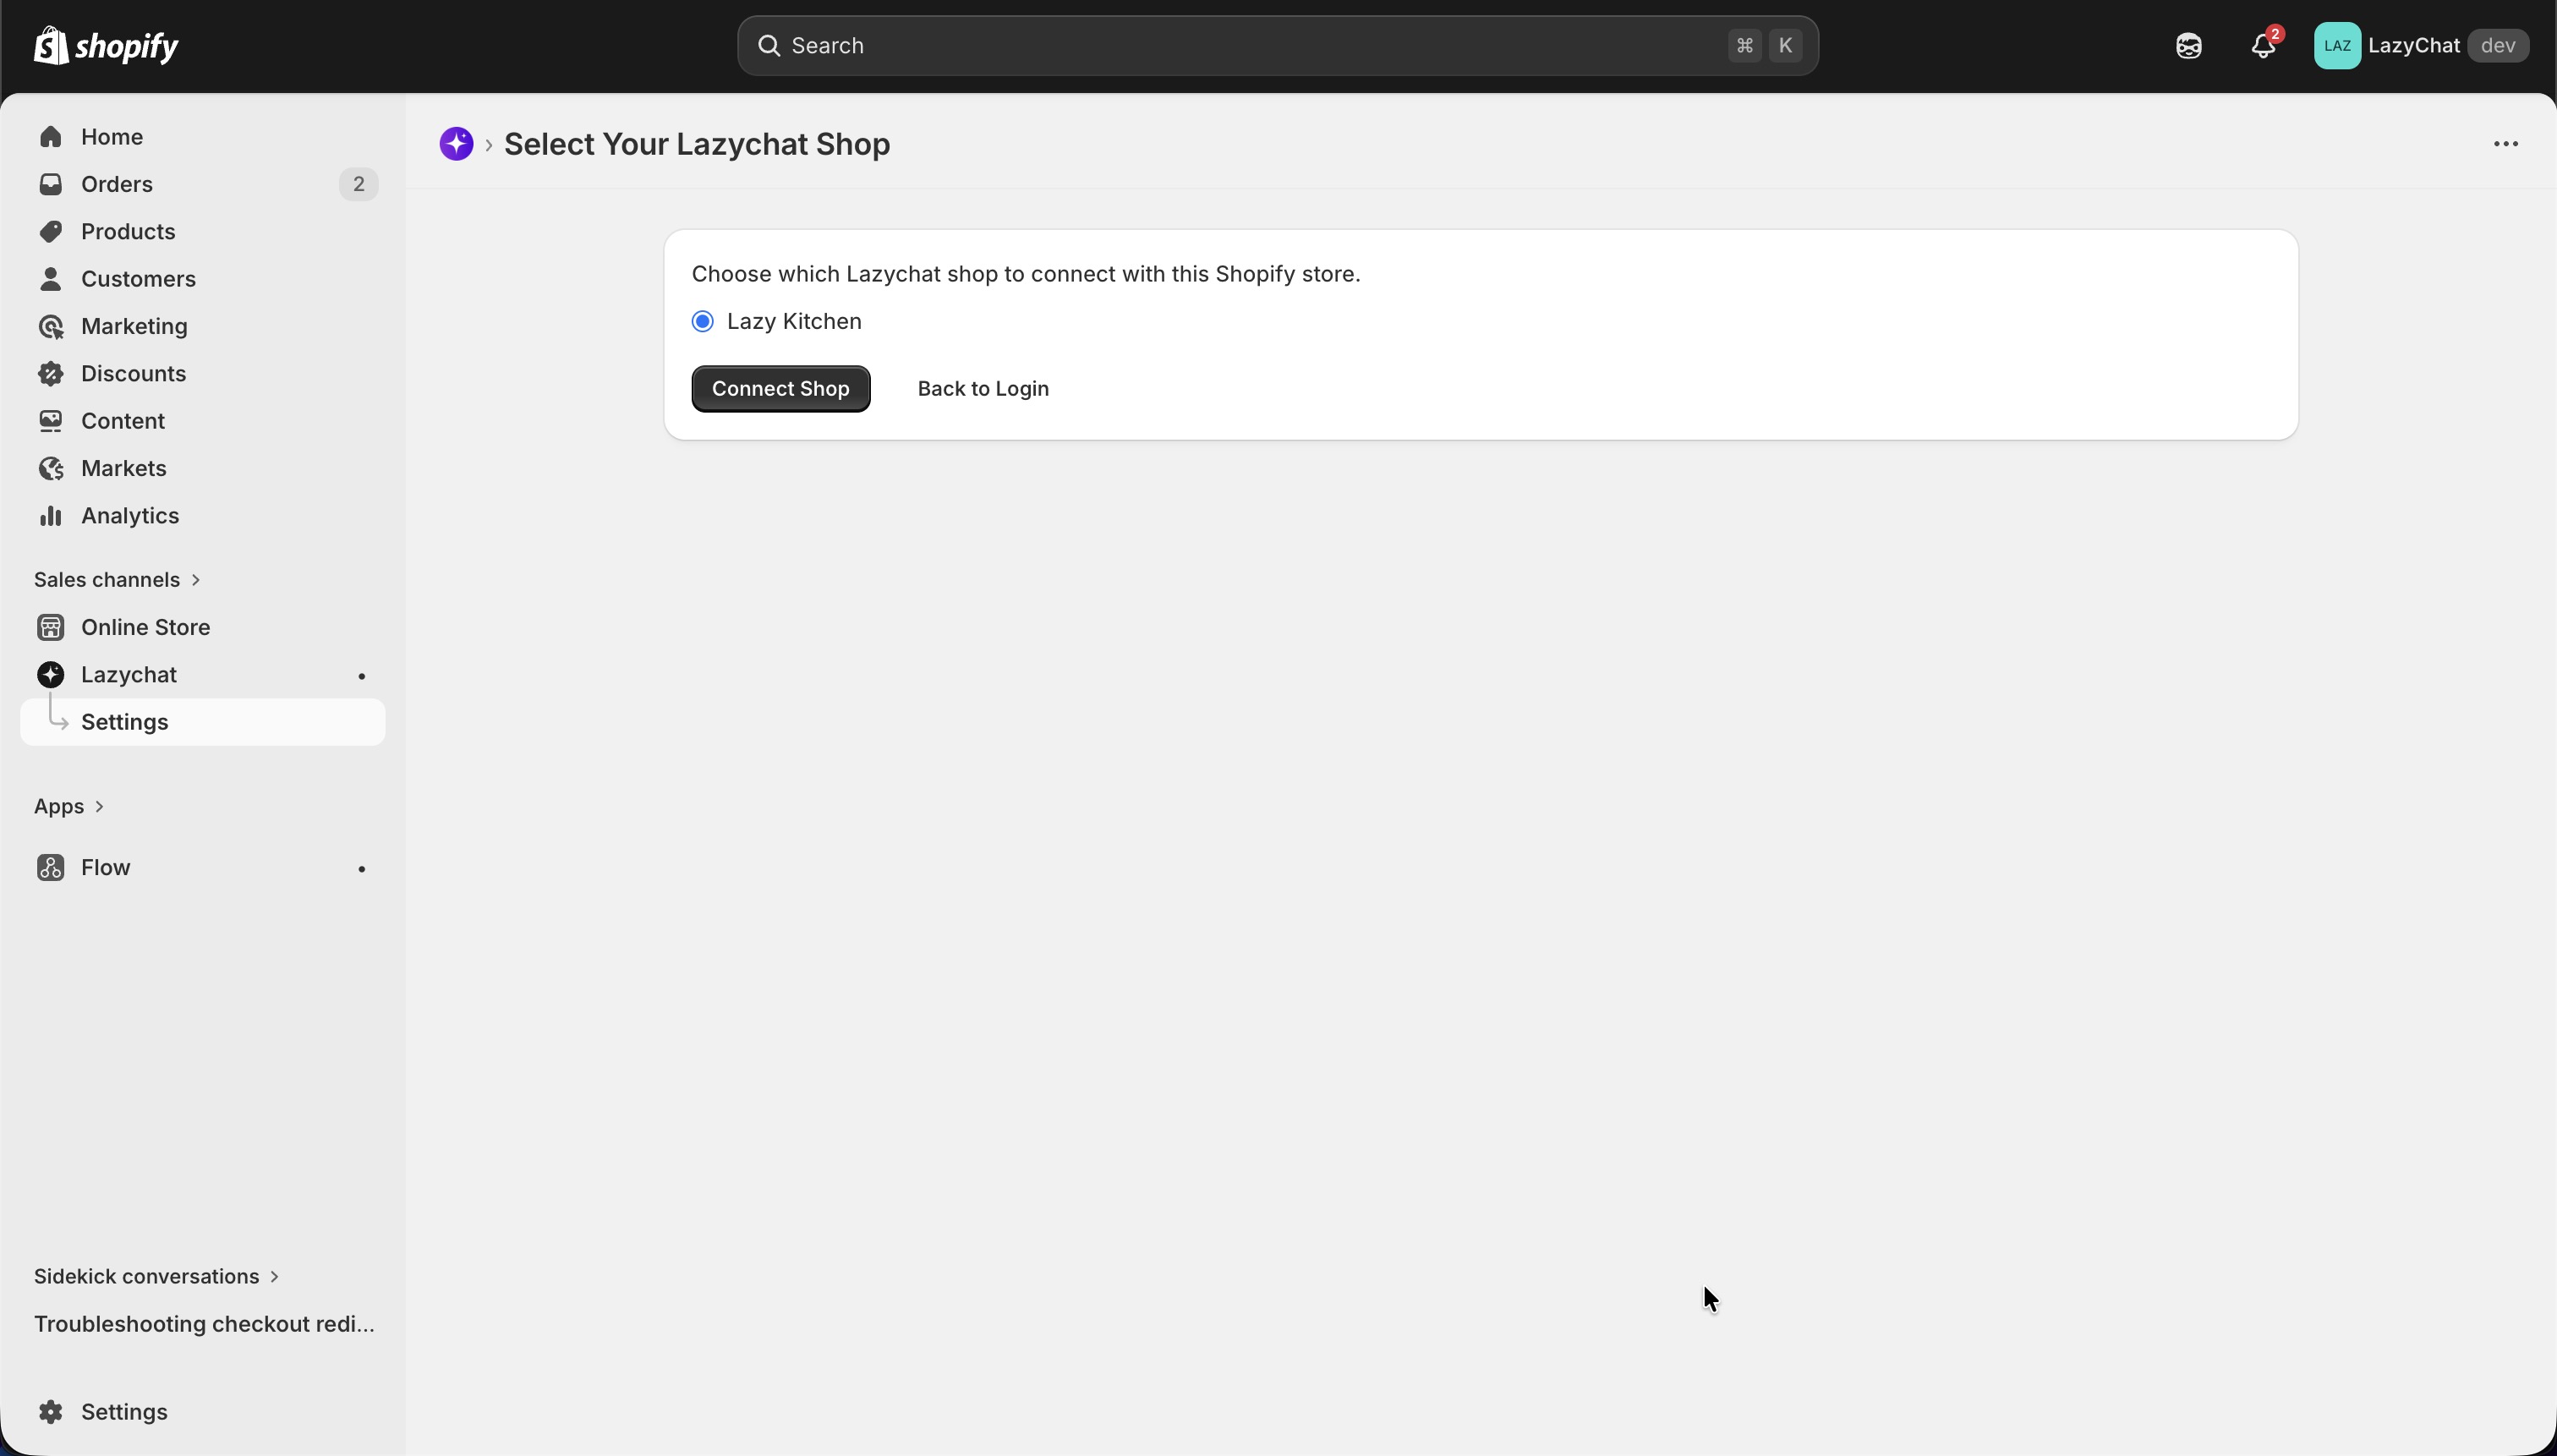 On the Select Your Lazychat Shop screen:
- Choose the LazyChat shop you want to connect with this Shopify store
- Tap Connect Shop
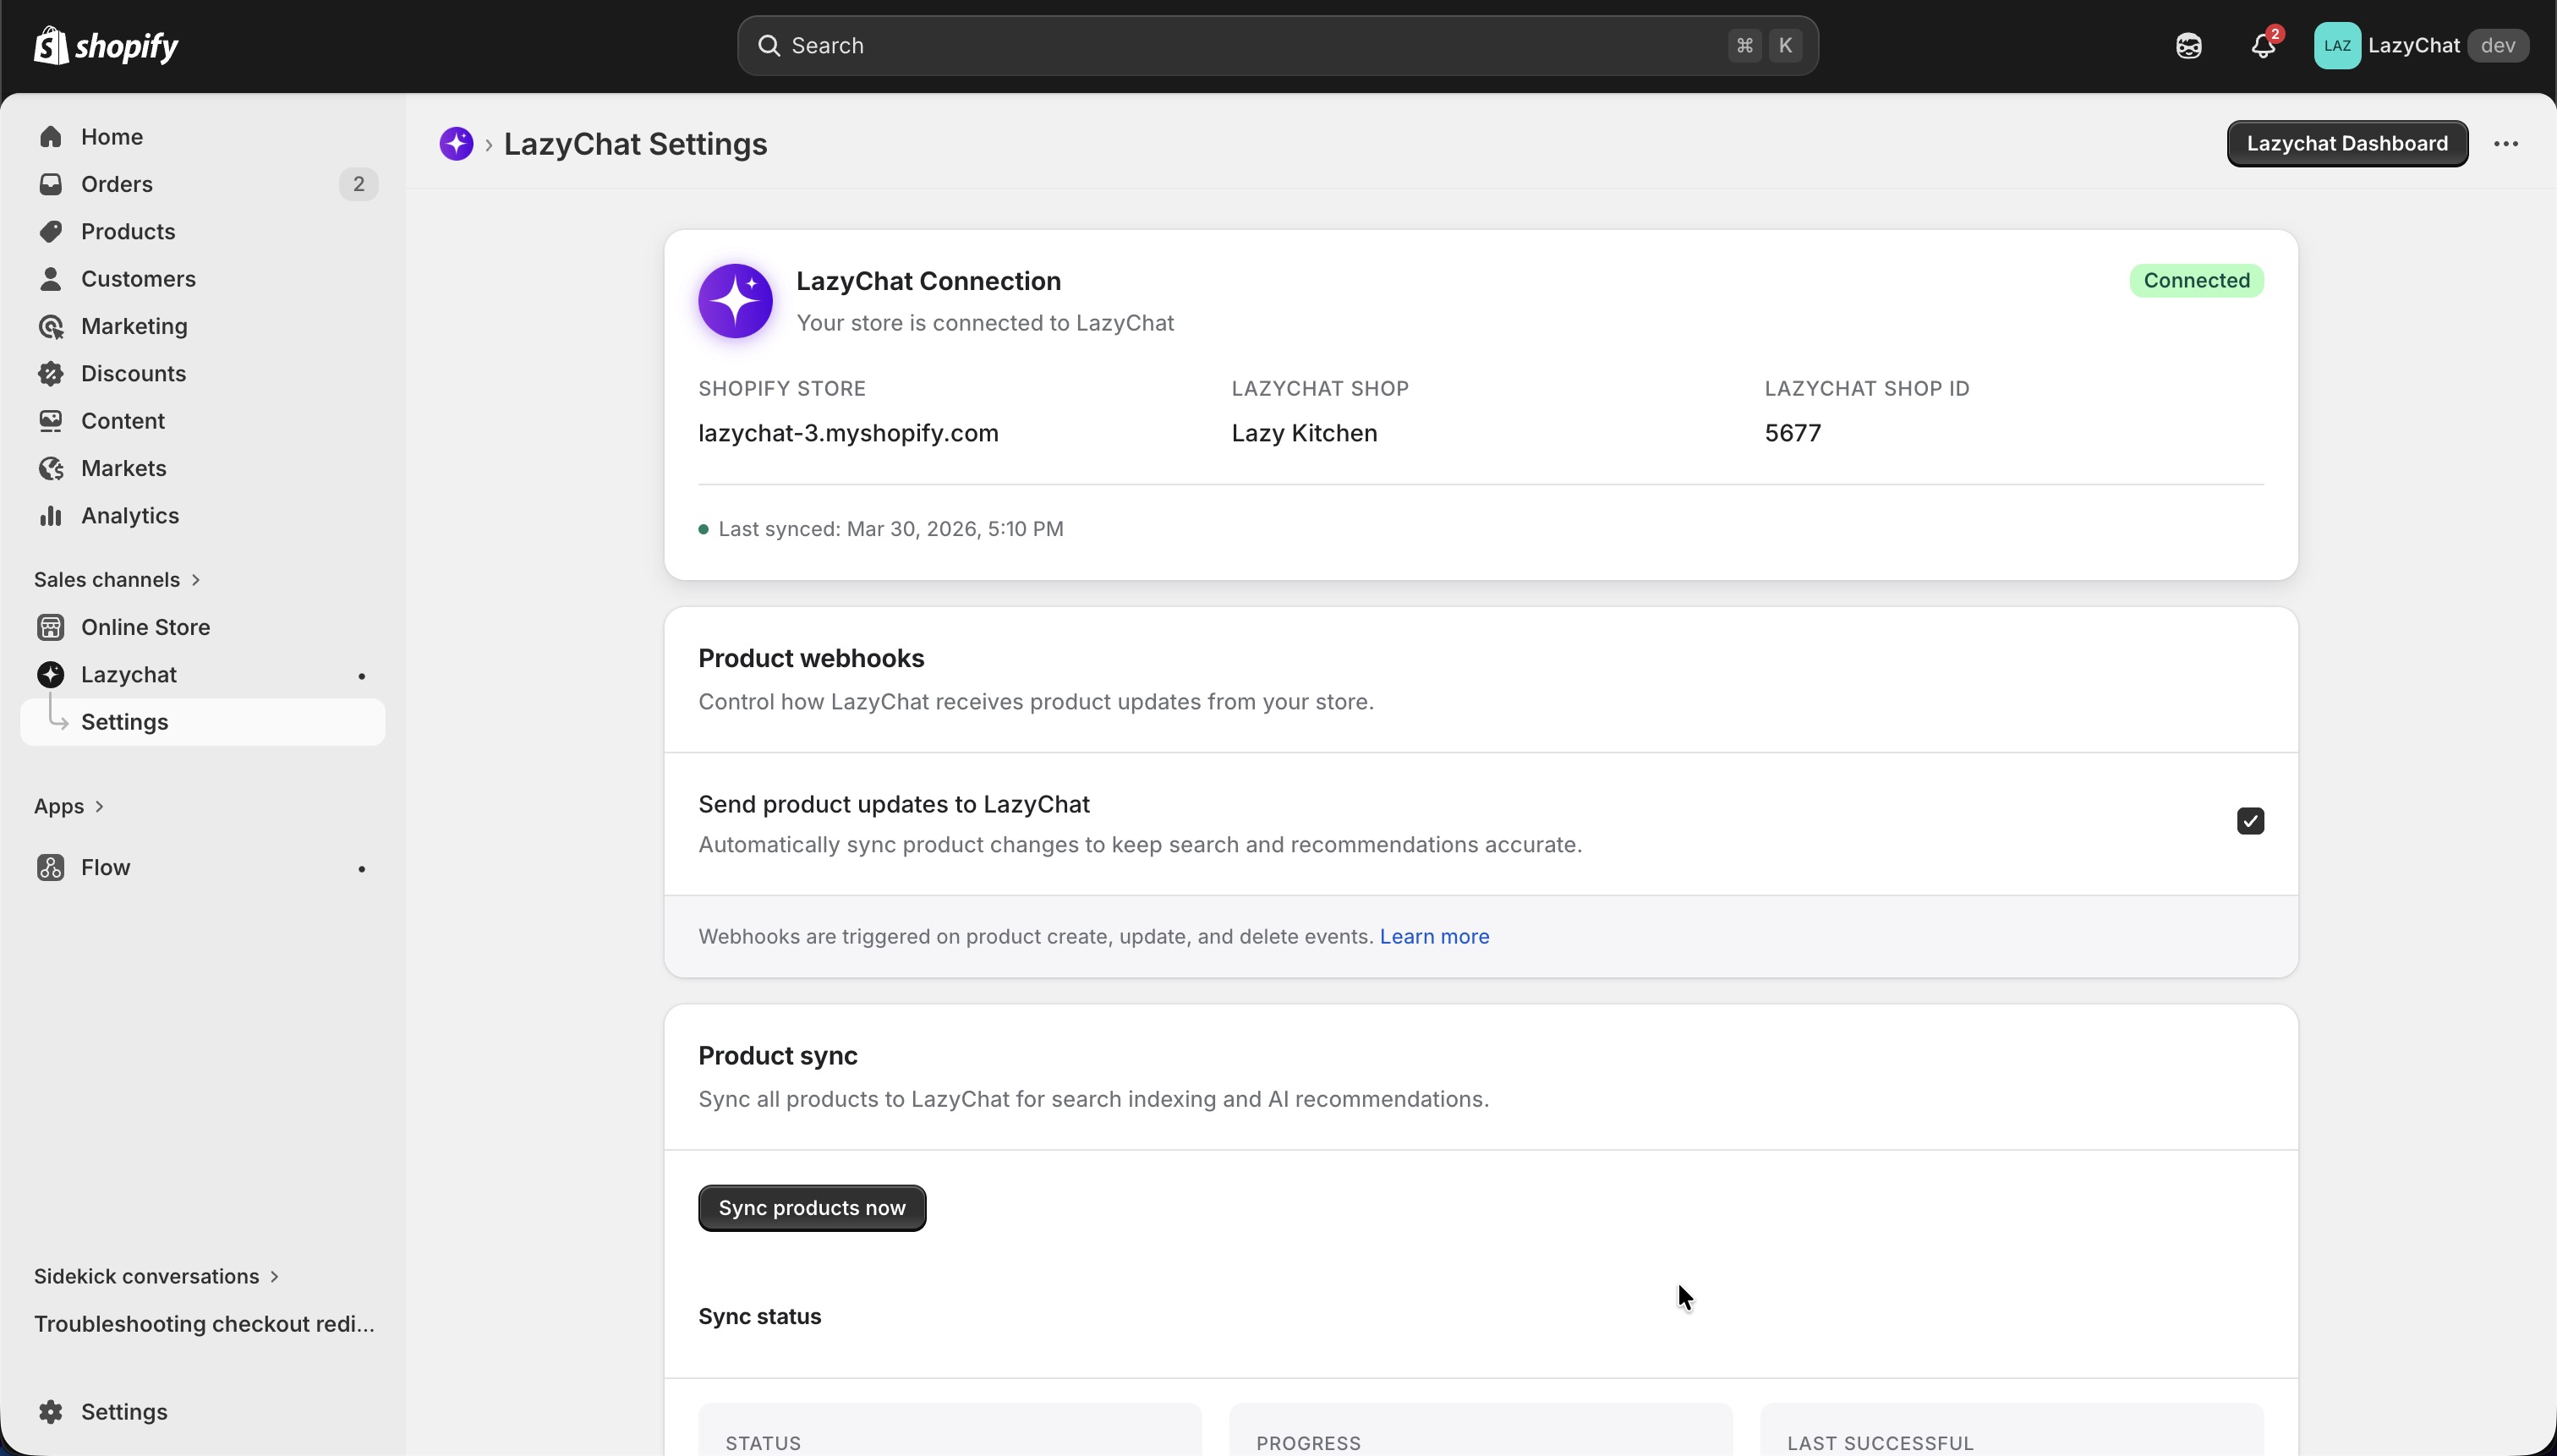
Step 6: Confirm successful connection
-
Click Sync products now to sync your products to LazyChat
-
After the connection is completed, the LazyChat Settings page in Shopify will show:
- Connection status: Connected
- Shopify store
- LazyChat shop
- LazyChat shop ID
- Last synced time
This confirms that your Shopify store is connected successfully.
- Click Lazychat Dashboard button to go to your lazychat account.
Final Check
 To verify from the LazyChat side:
- Return to LazyChat (Lazychat Dashboard) → Integrations
- Check the Shopify option
You should see:
- A Disconnect button