Steps to Connect WhatsApp
Step 1: Continue with WhatsApp

- In the Meta popup, click Continue as [your Facebook Page].
Step 2: Start WhatsApp onboarding
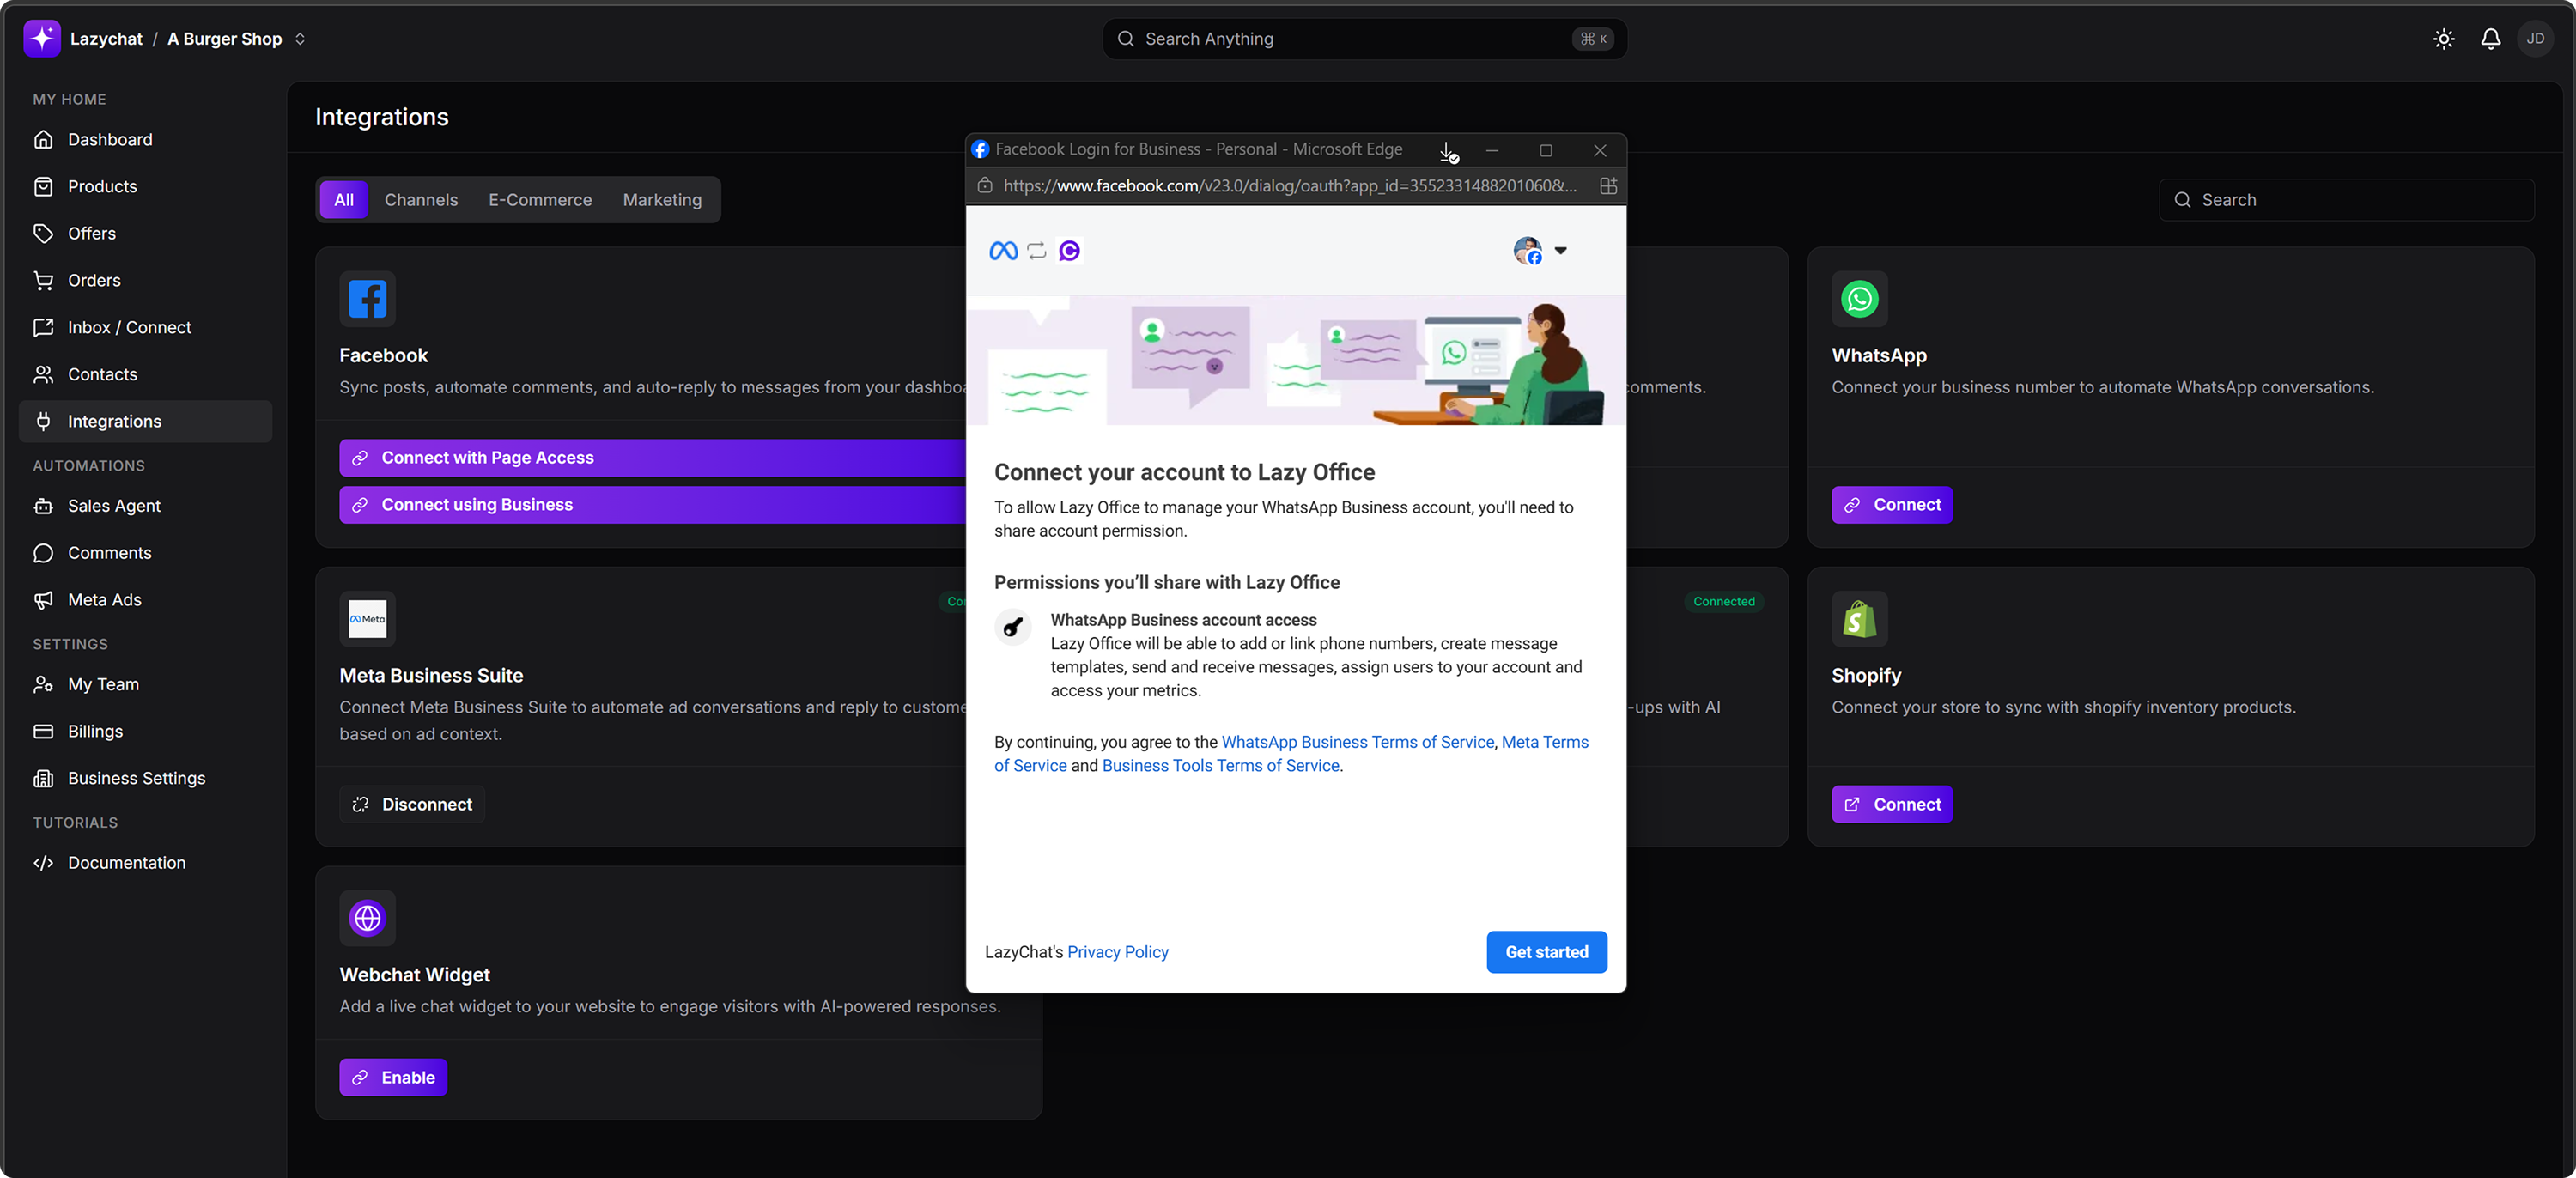
- On the screen Connect your account to Lazy Office, click Get started.
Step 3: Fill in business information
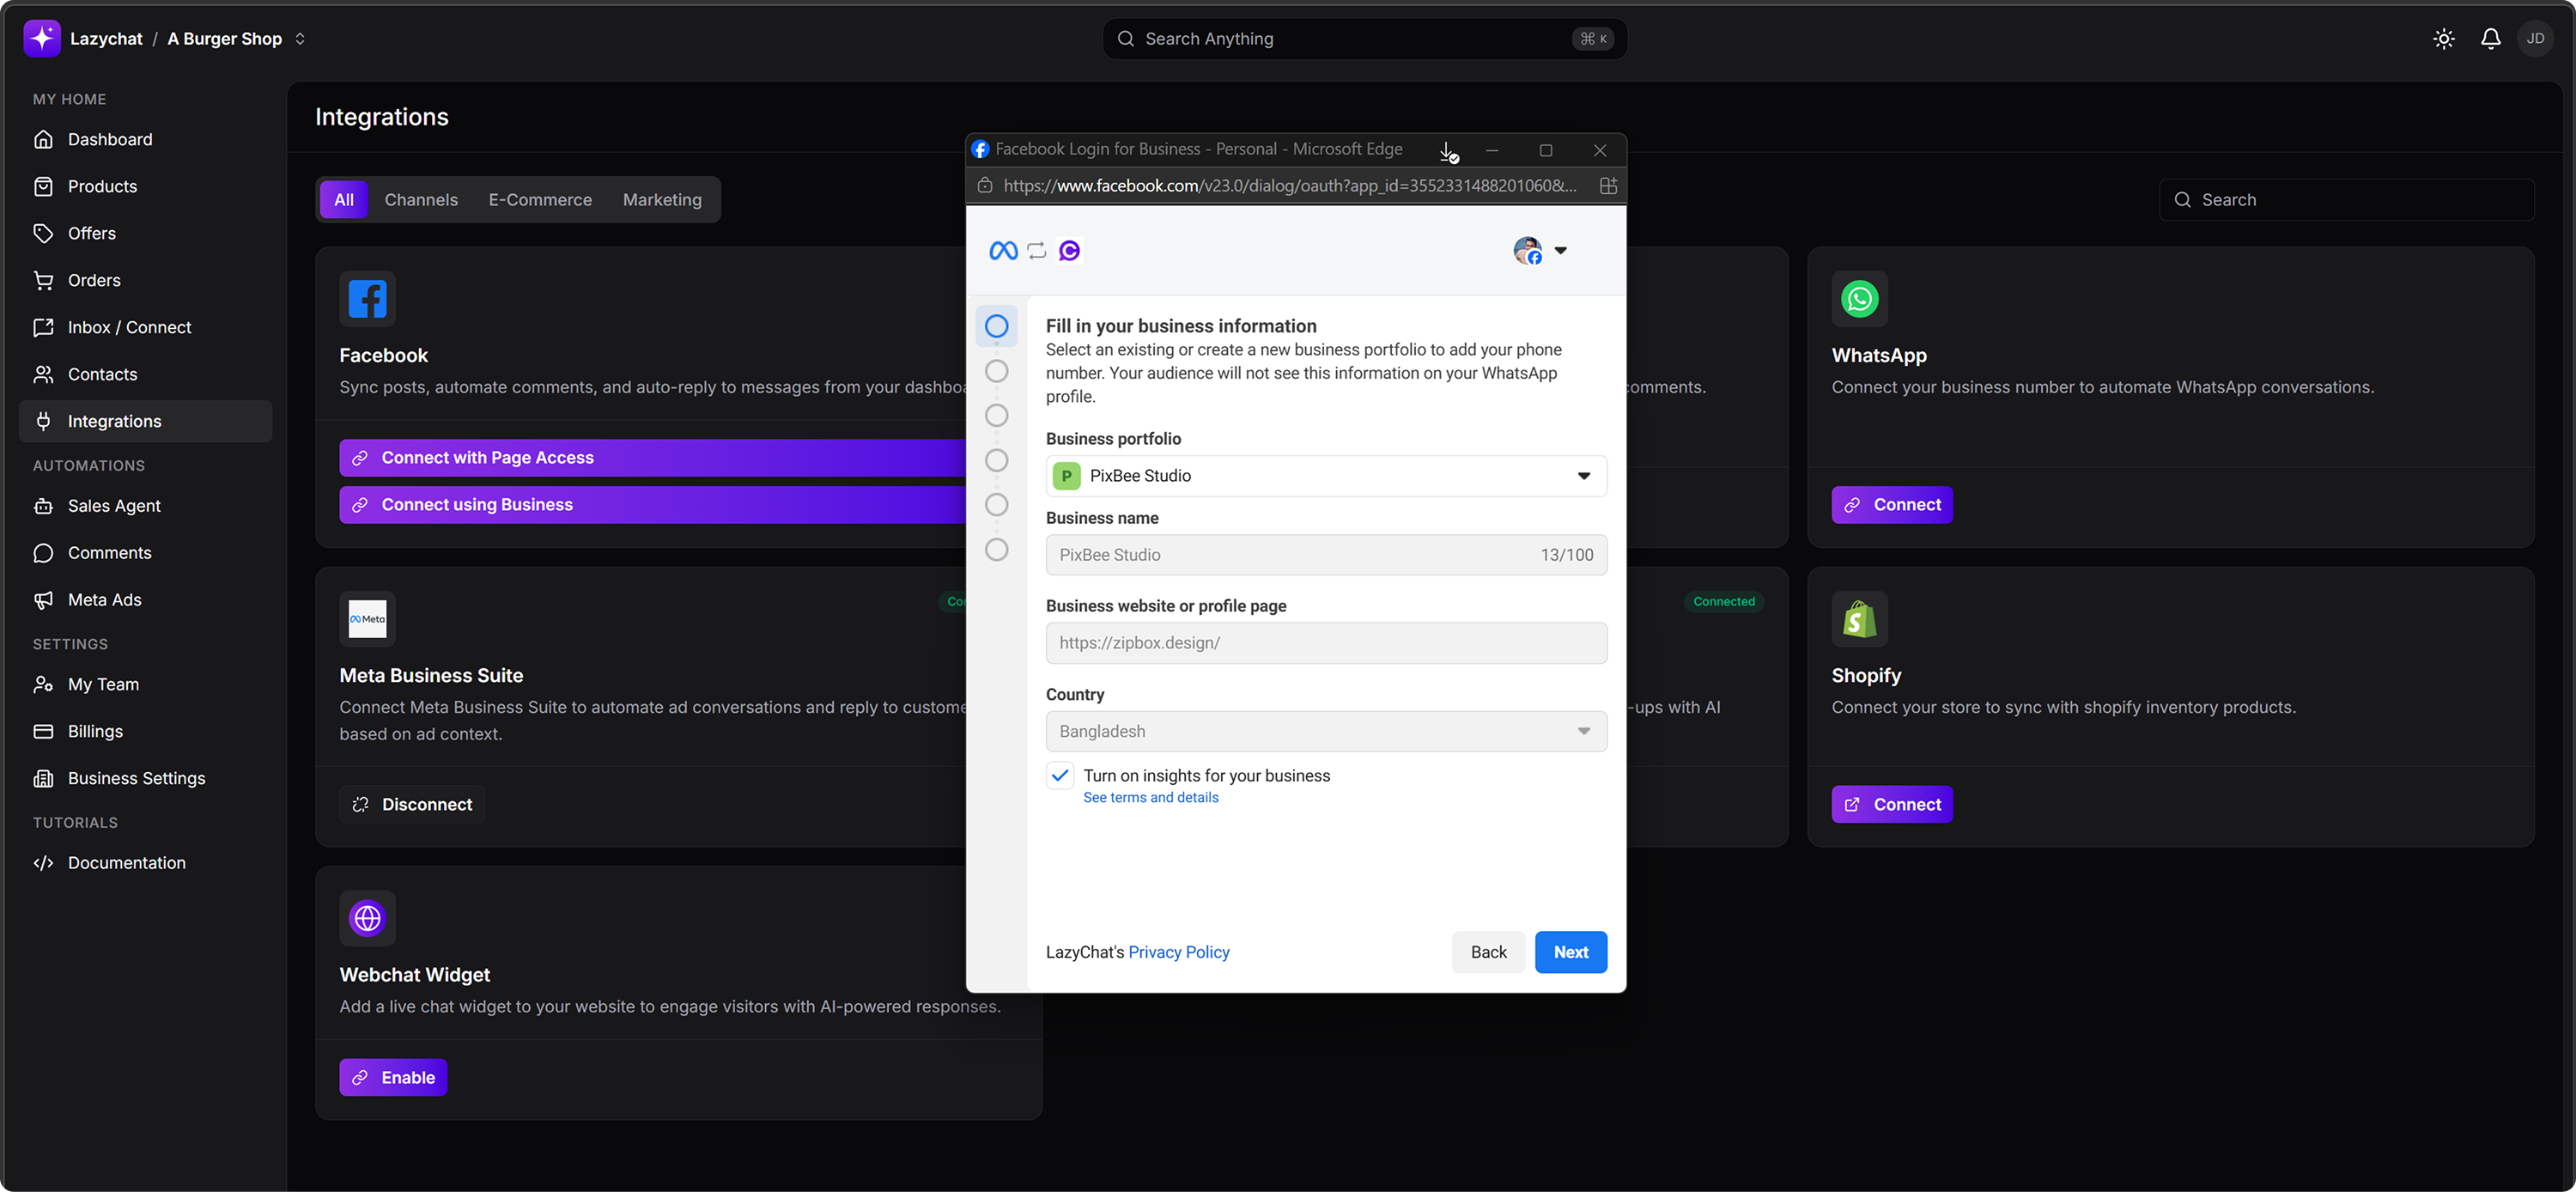 Complete the following fields:
- Business portfolio
- Business name
- Business website or profile page
- Country
- Keep Turn on insights for your business checked if needed
Then click Next.
Step 4: Select your setup
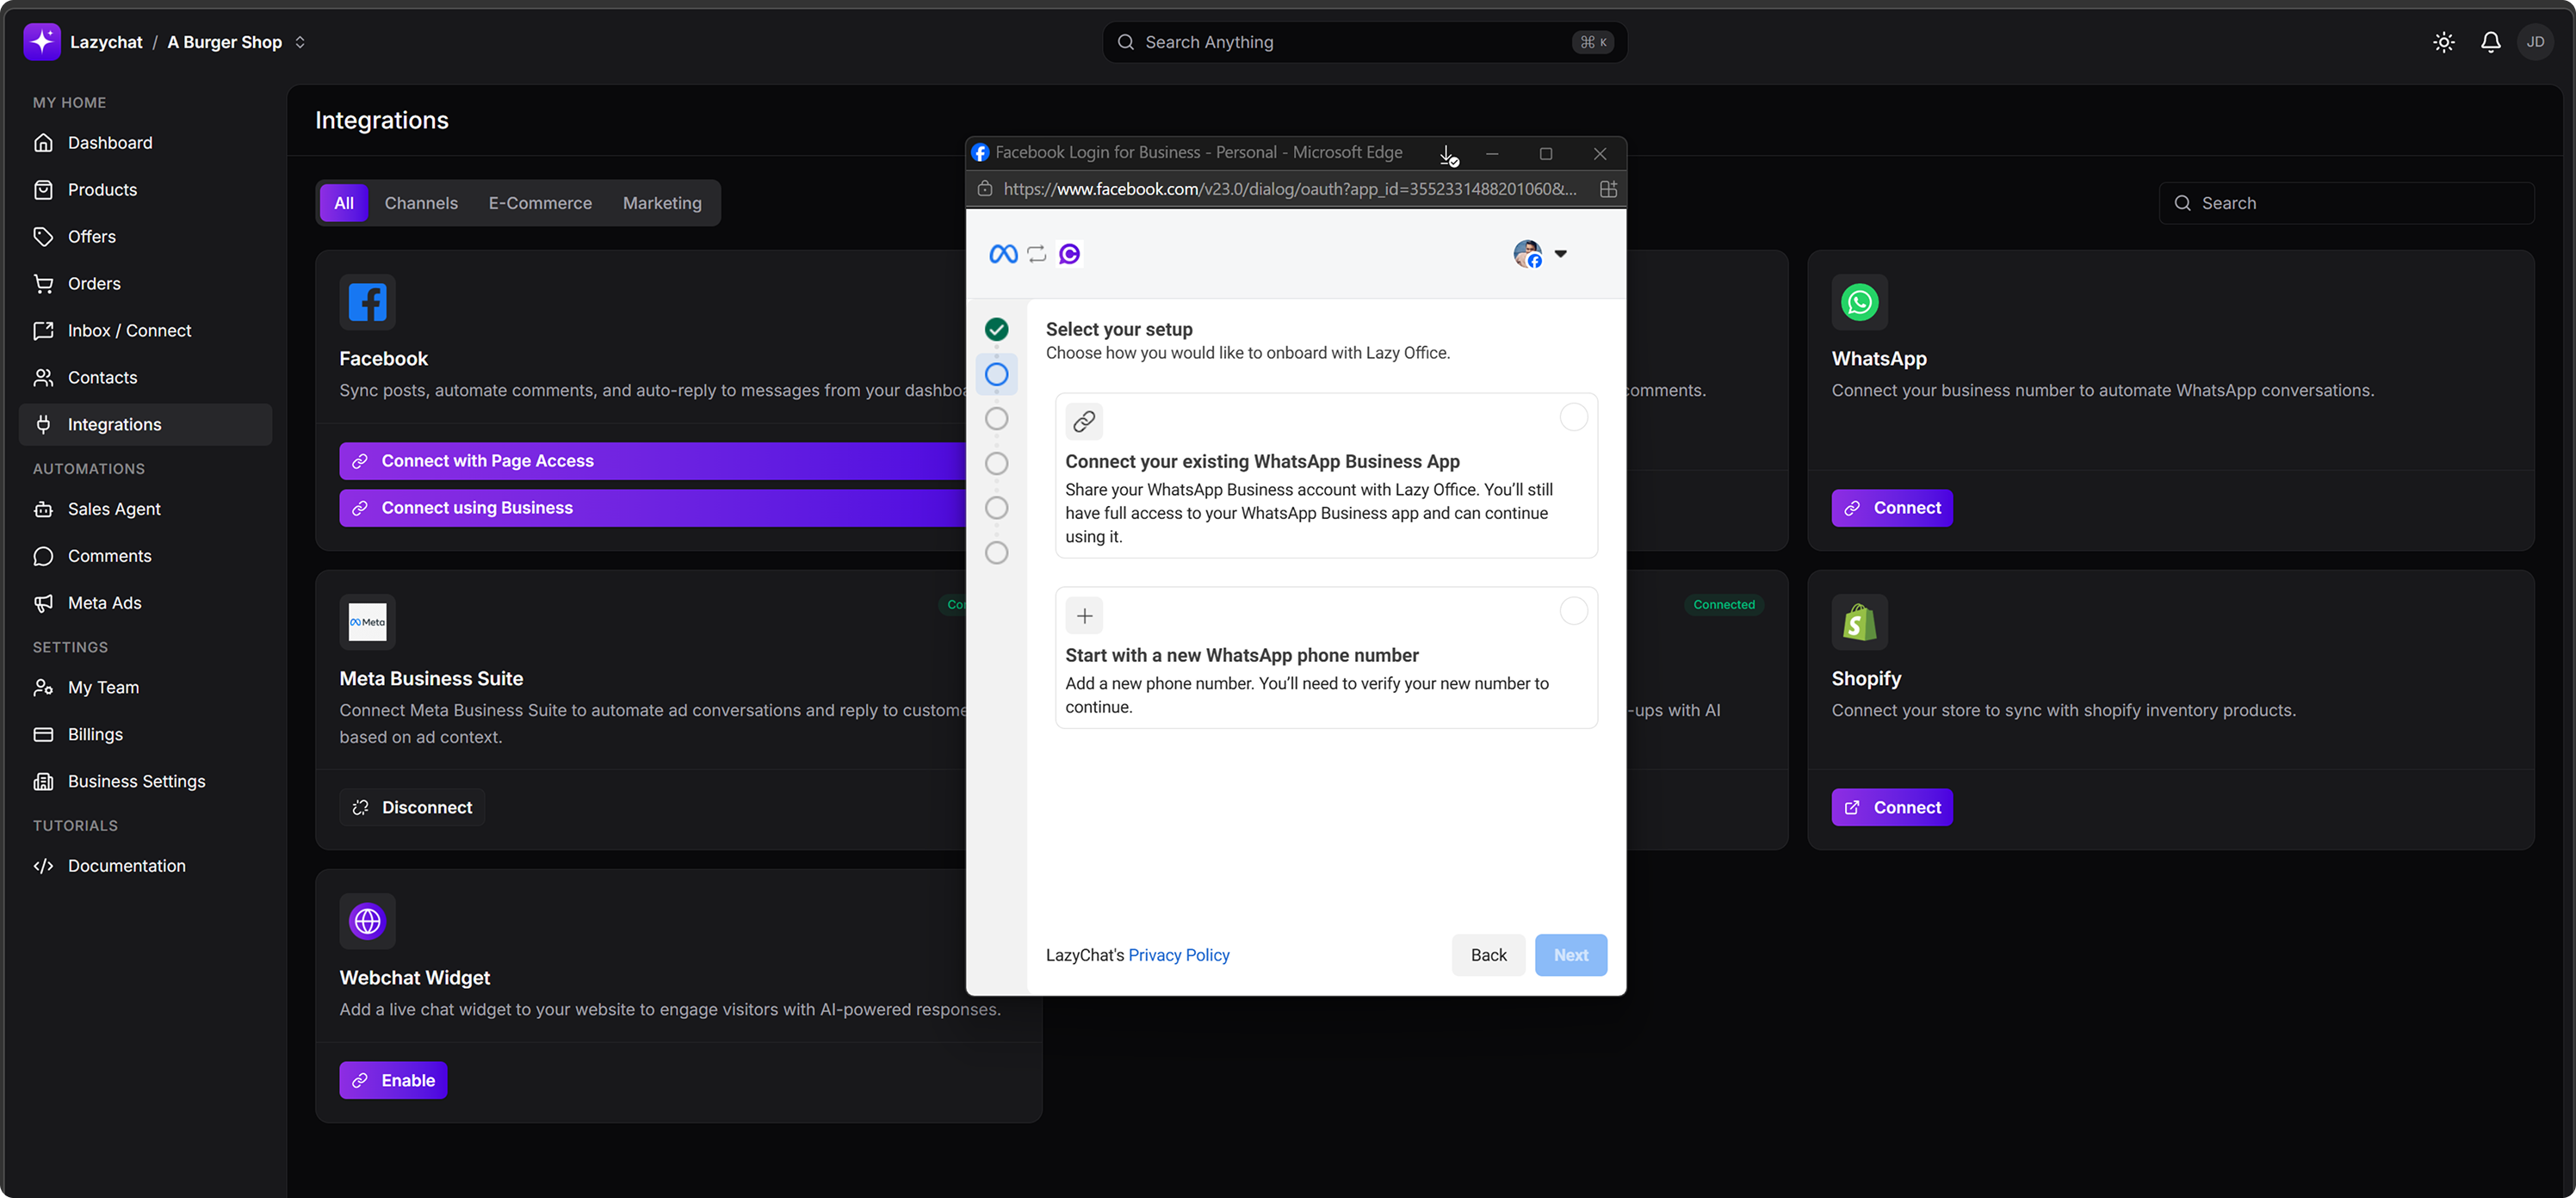 Choose one of the following:
- Connect your existing WhatsApp Business App
- Start with a new WhatsApp phone number
Click Next.
Step 5: Review access details
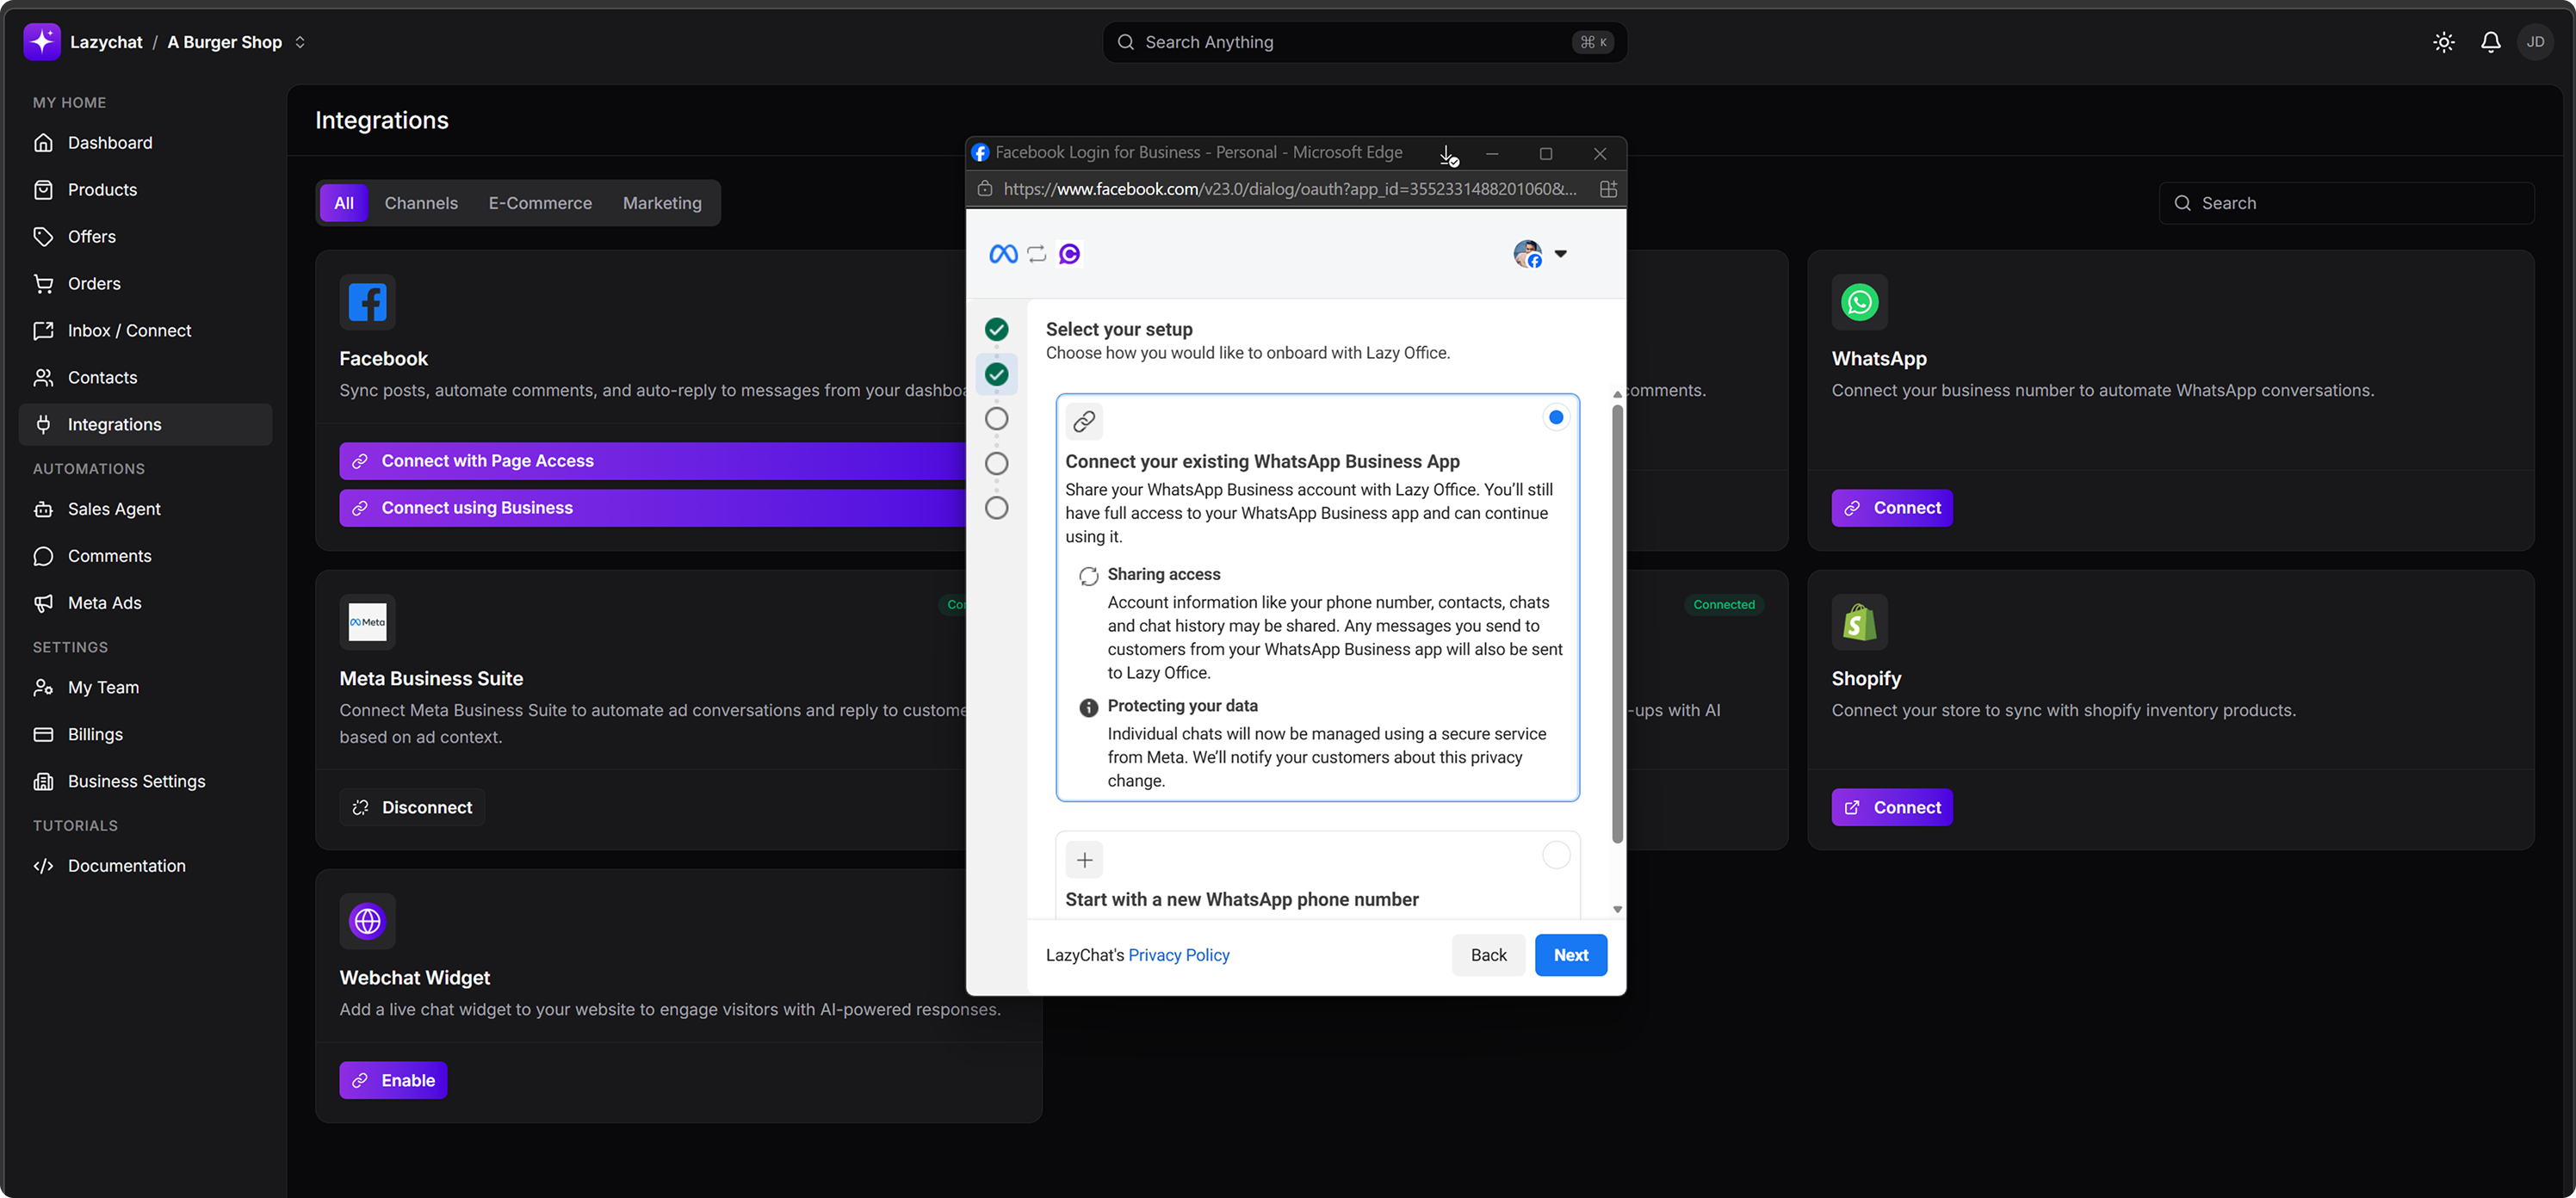
- Review the sharing and data protection information.
- Click Next.
Step 6: Enter WhatsApp Business phone number
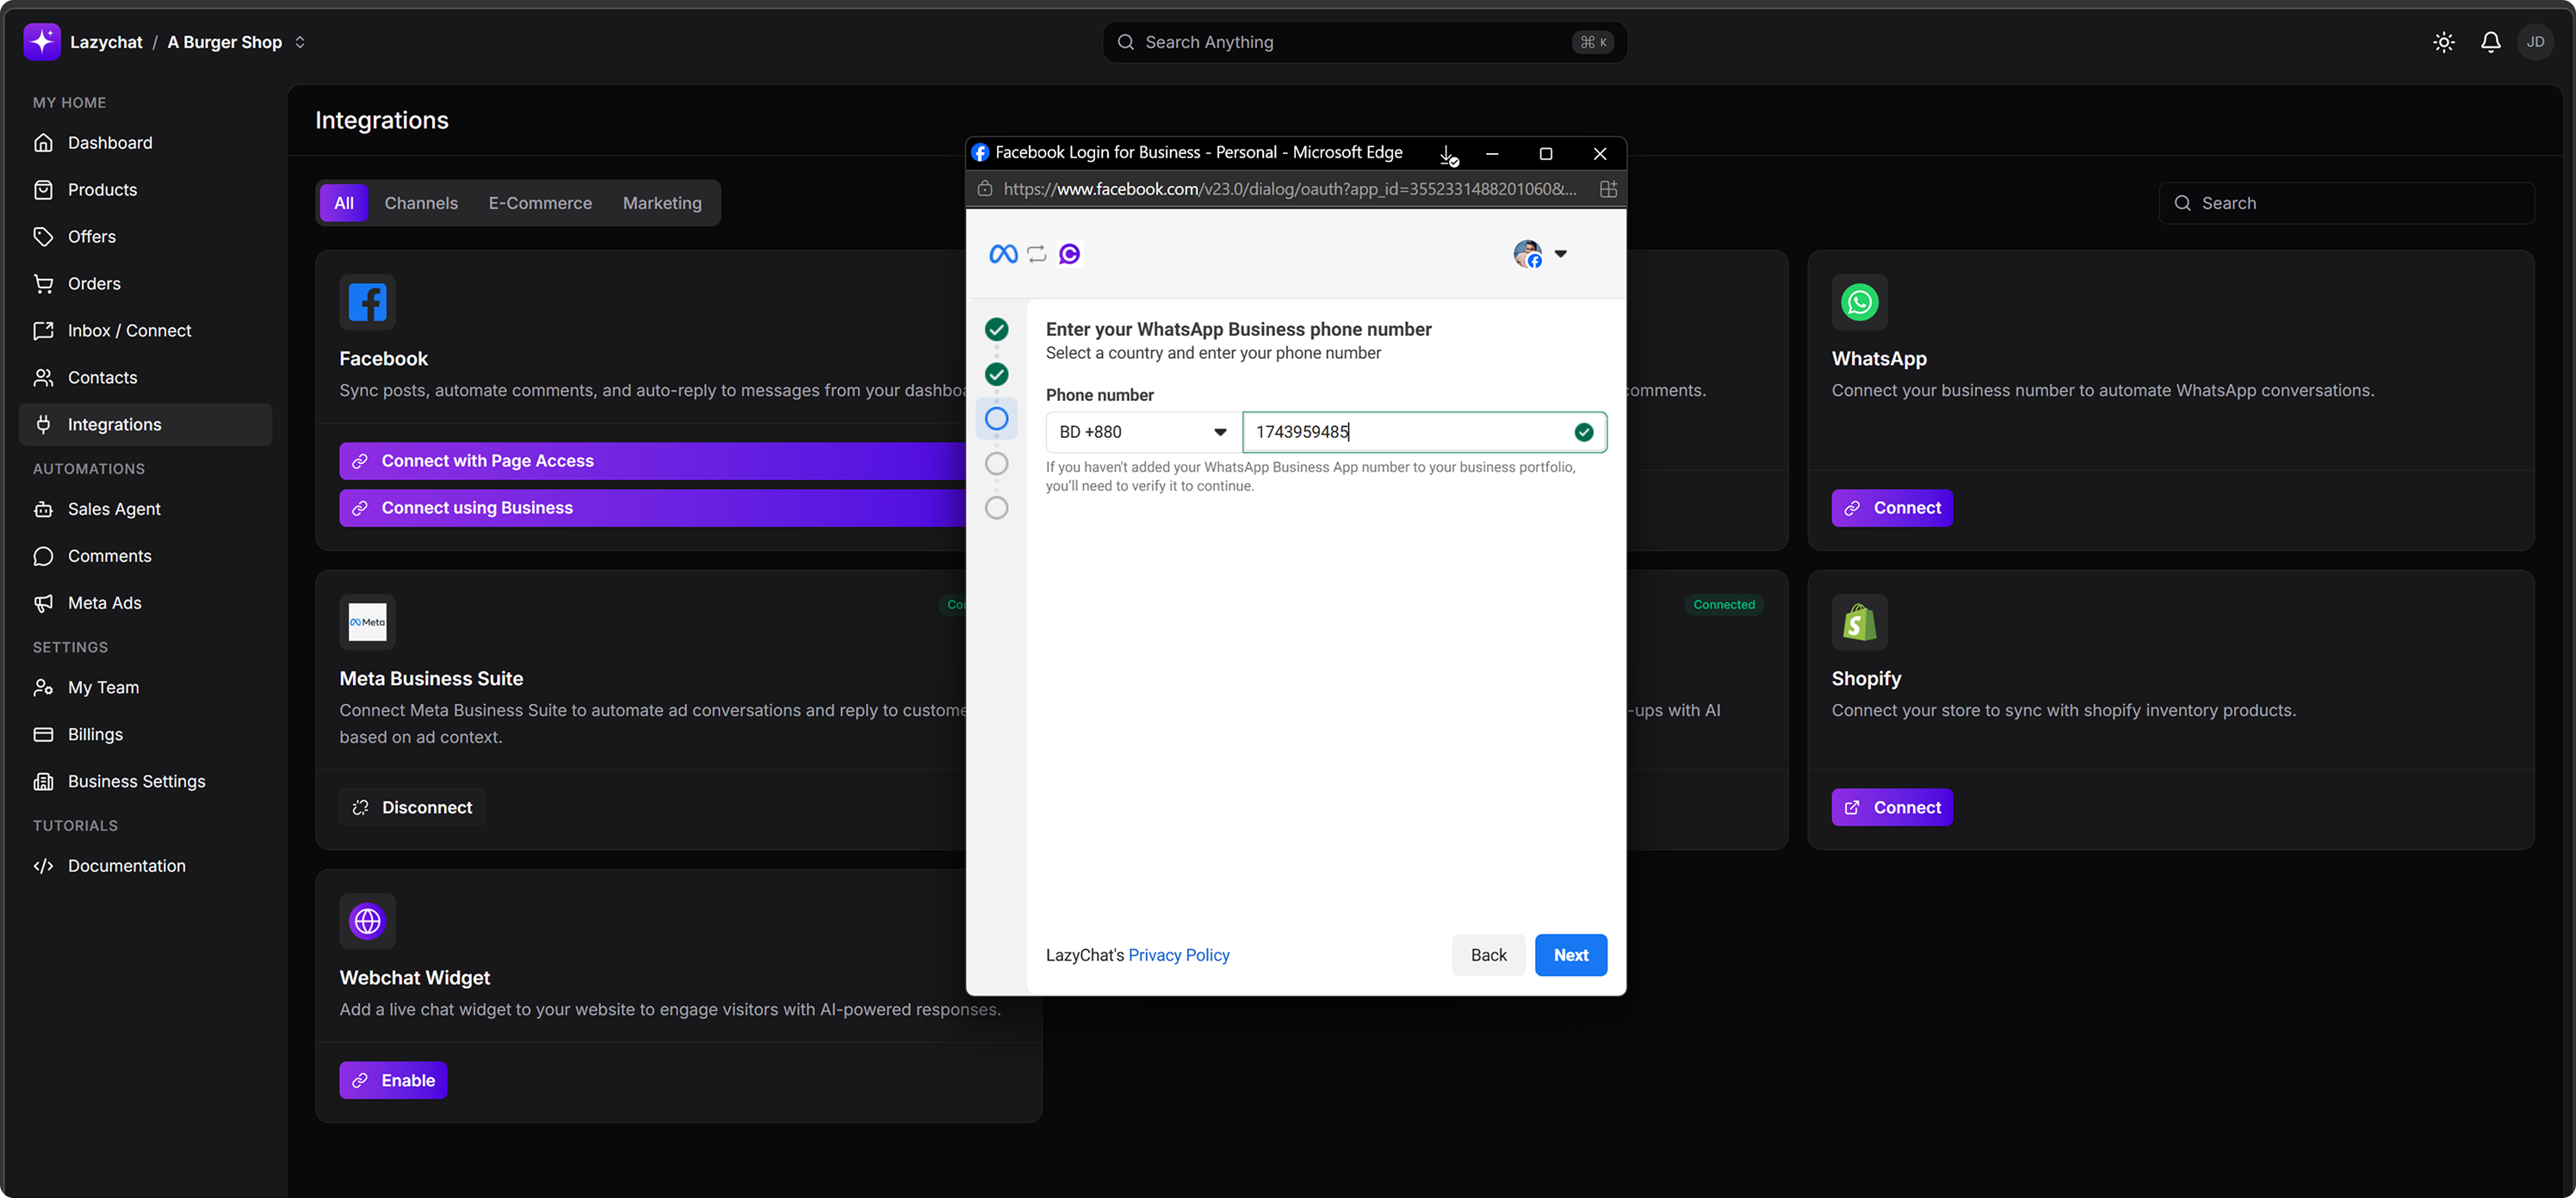
- Select the country code
- Enter your WhatsApp Business phone number
Click Next.
Step 7: Import contacts and chat history
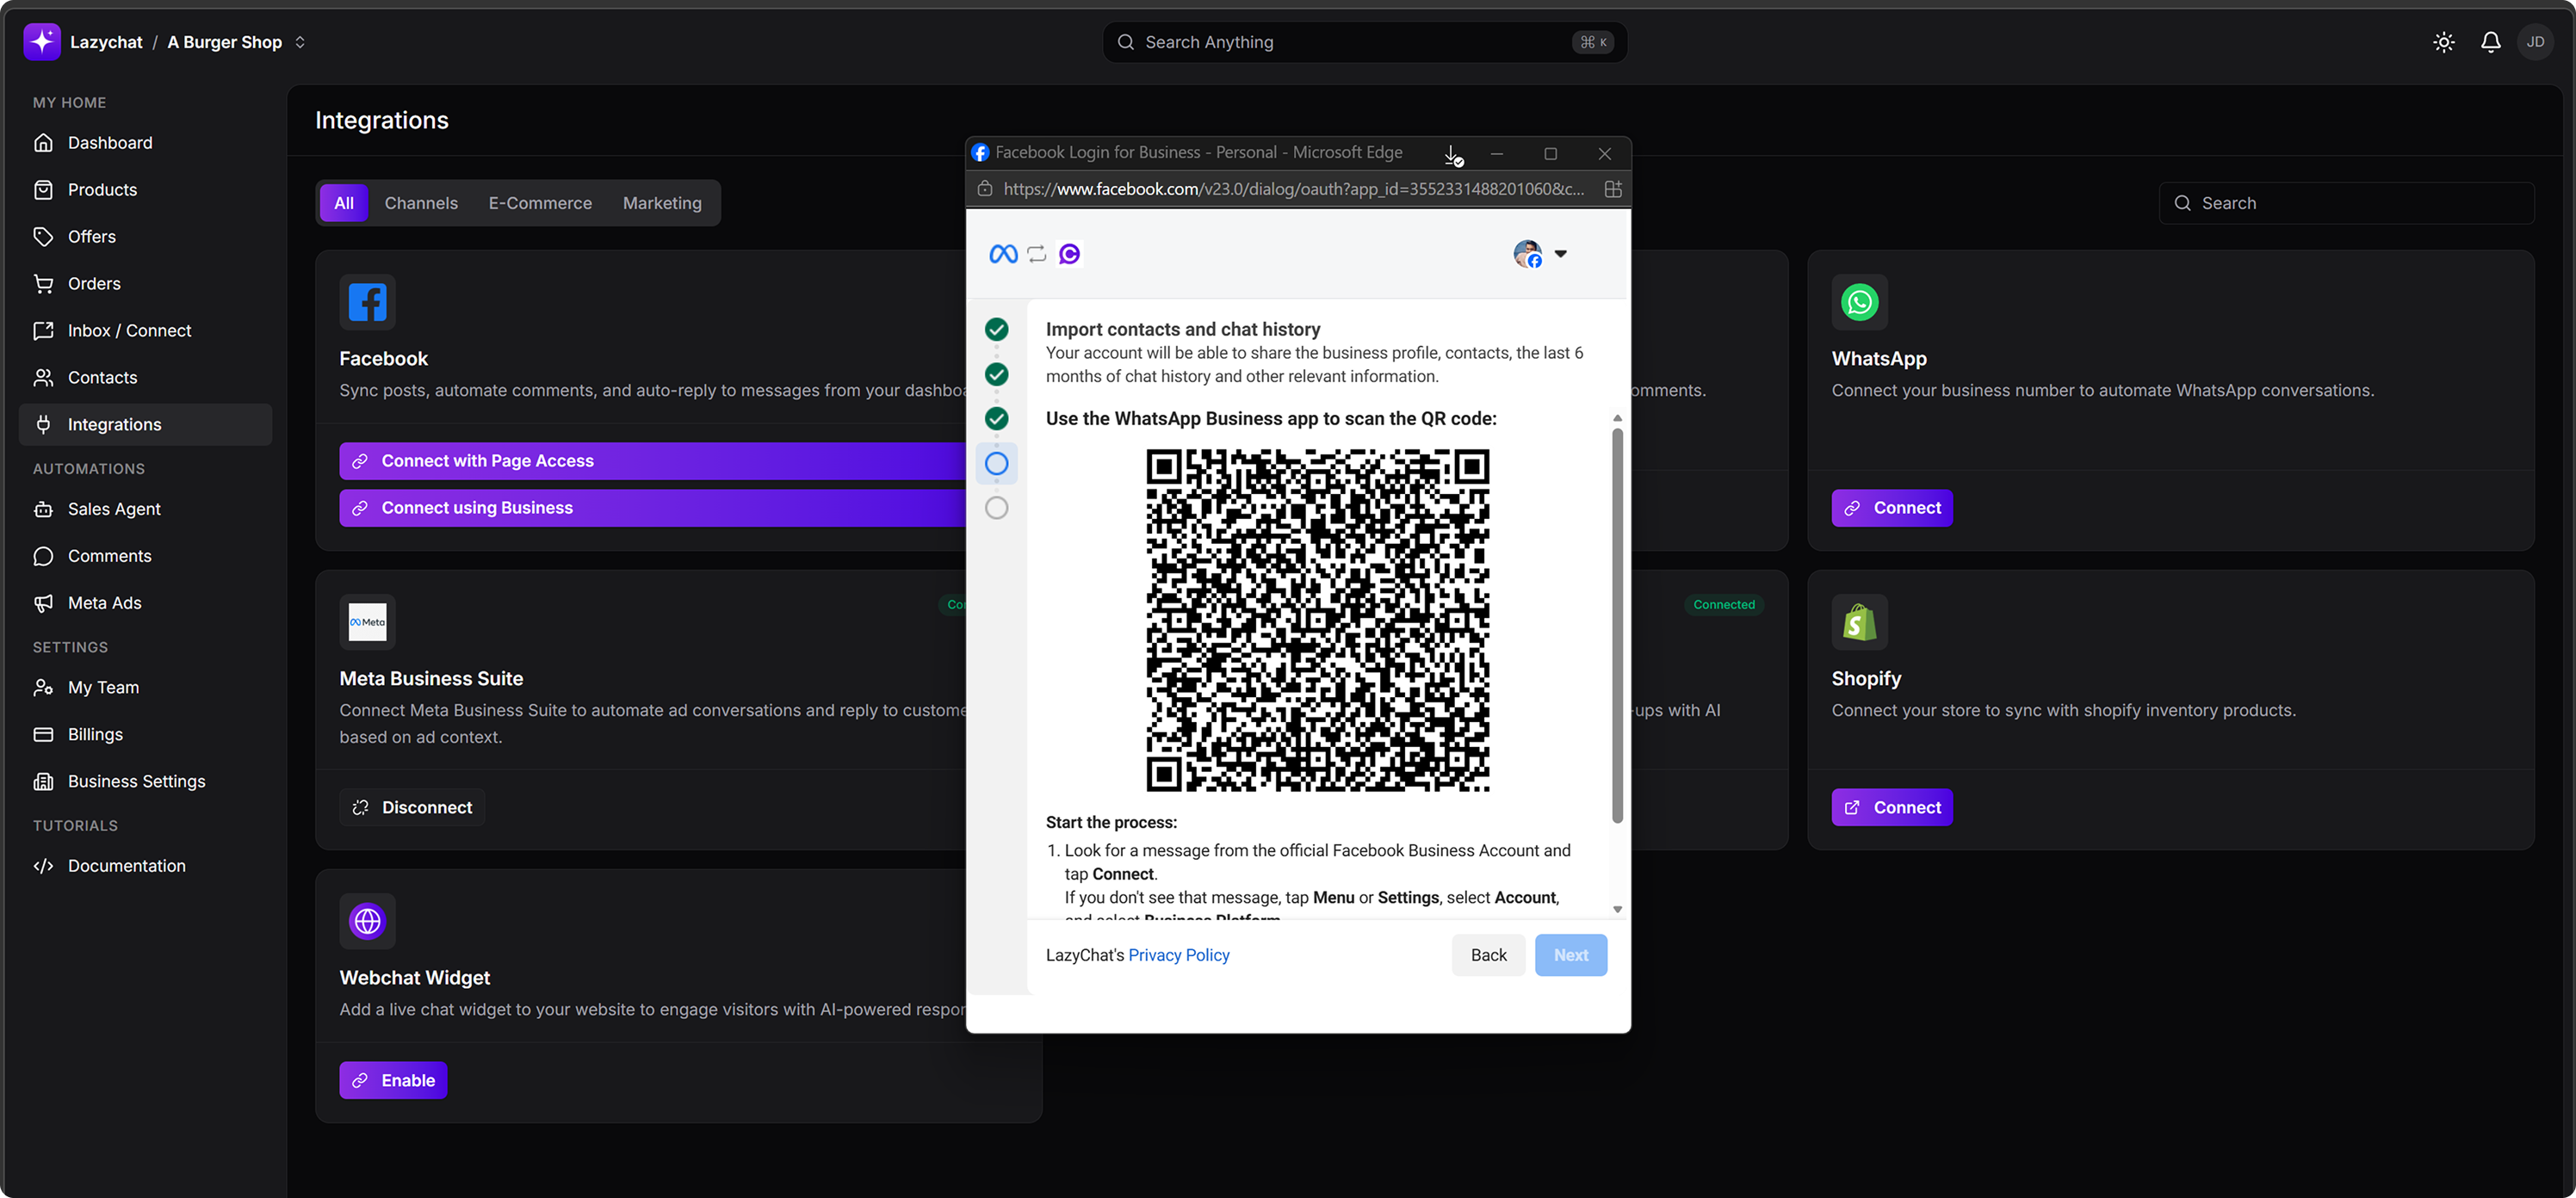
- Open the WhatsApp Business app
- Scan the QR code shown in the Meta popup
The popup indicates:
- Look for a message from the official Facebook Business Account
- Tap Connect
- If you do not see the message, go to WhatsApp Business > Menu/Settings > Account > Business Platform
- Scan the QR code
Step 8: Confirm WhatsApp Business account
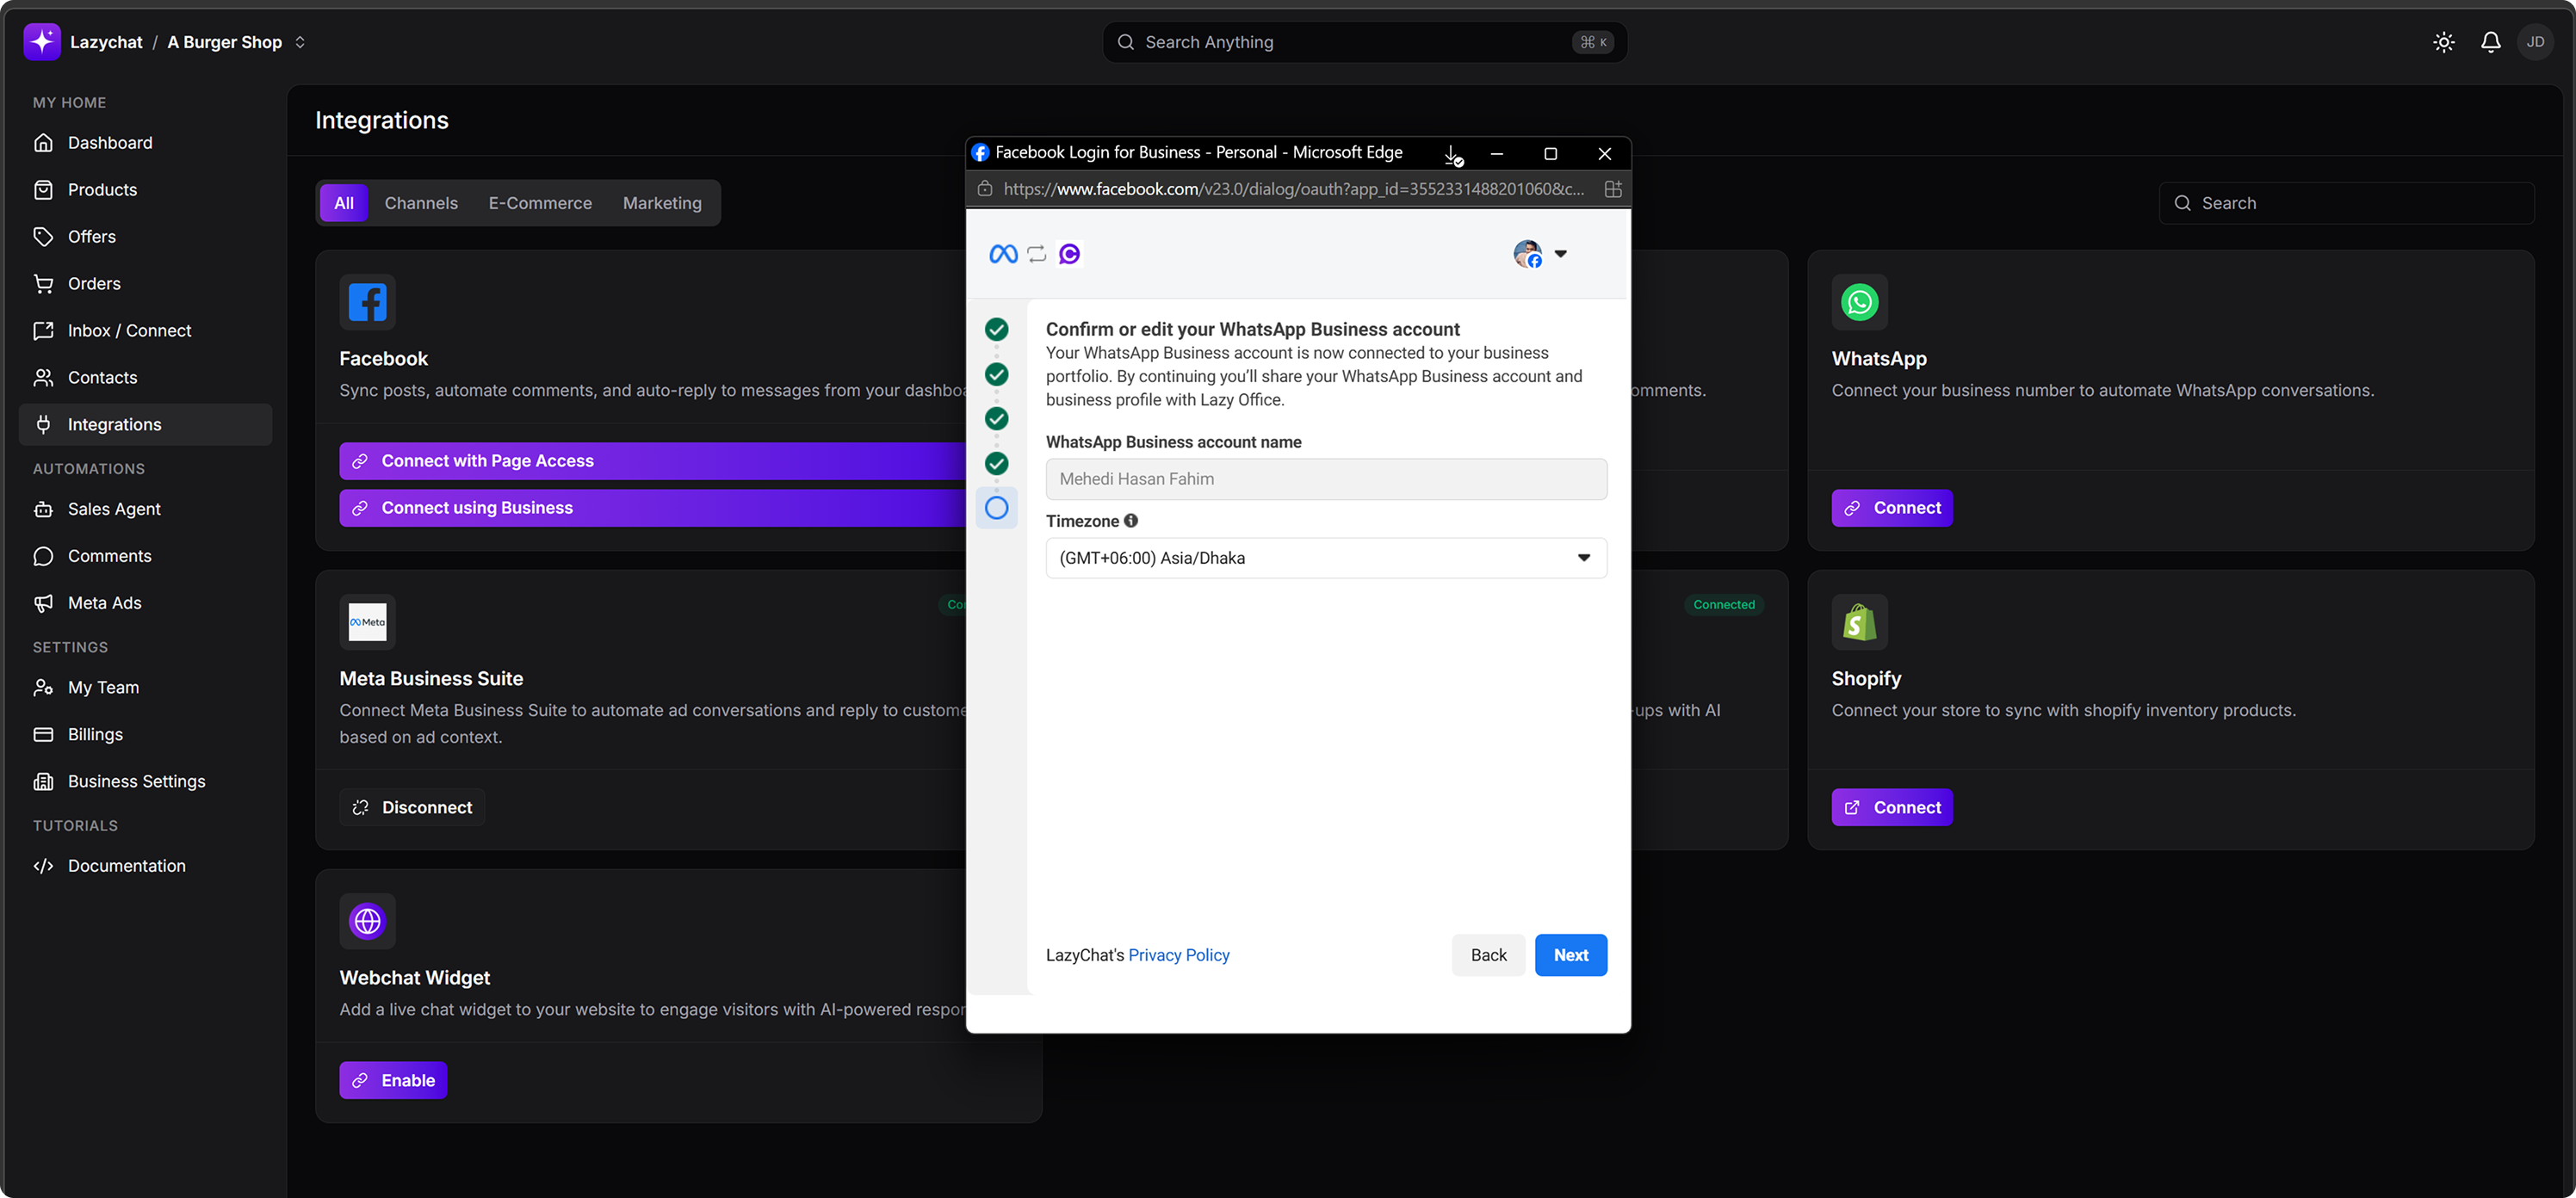 Review or edit:
- WhatsApp Business account name
- Timezone
Click Next.
Step 9: Review LazyChat access request
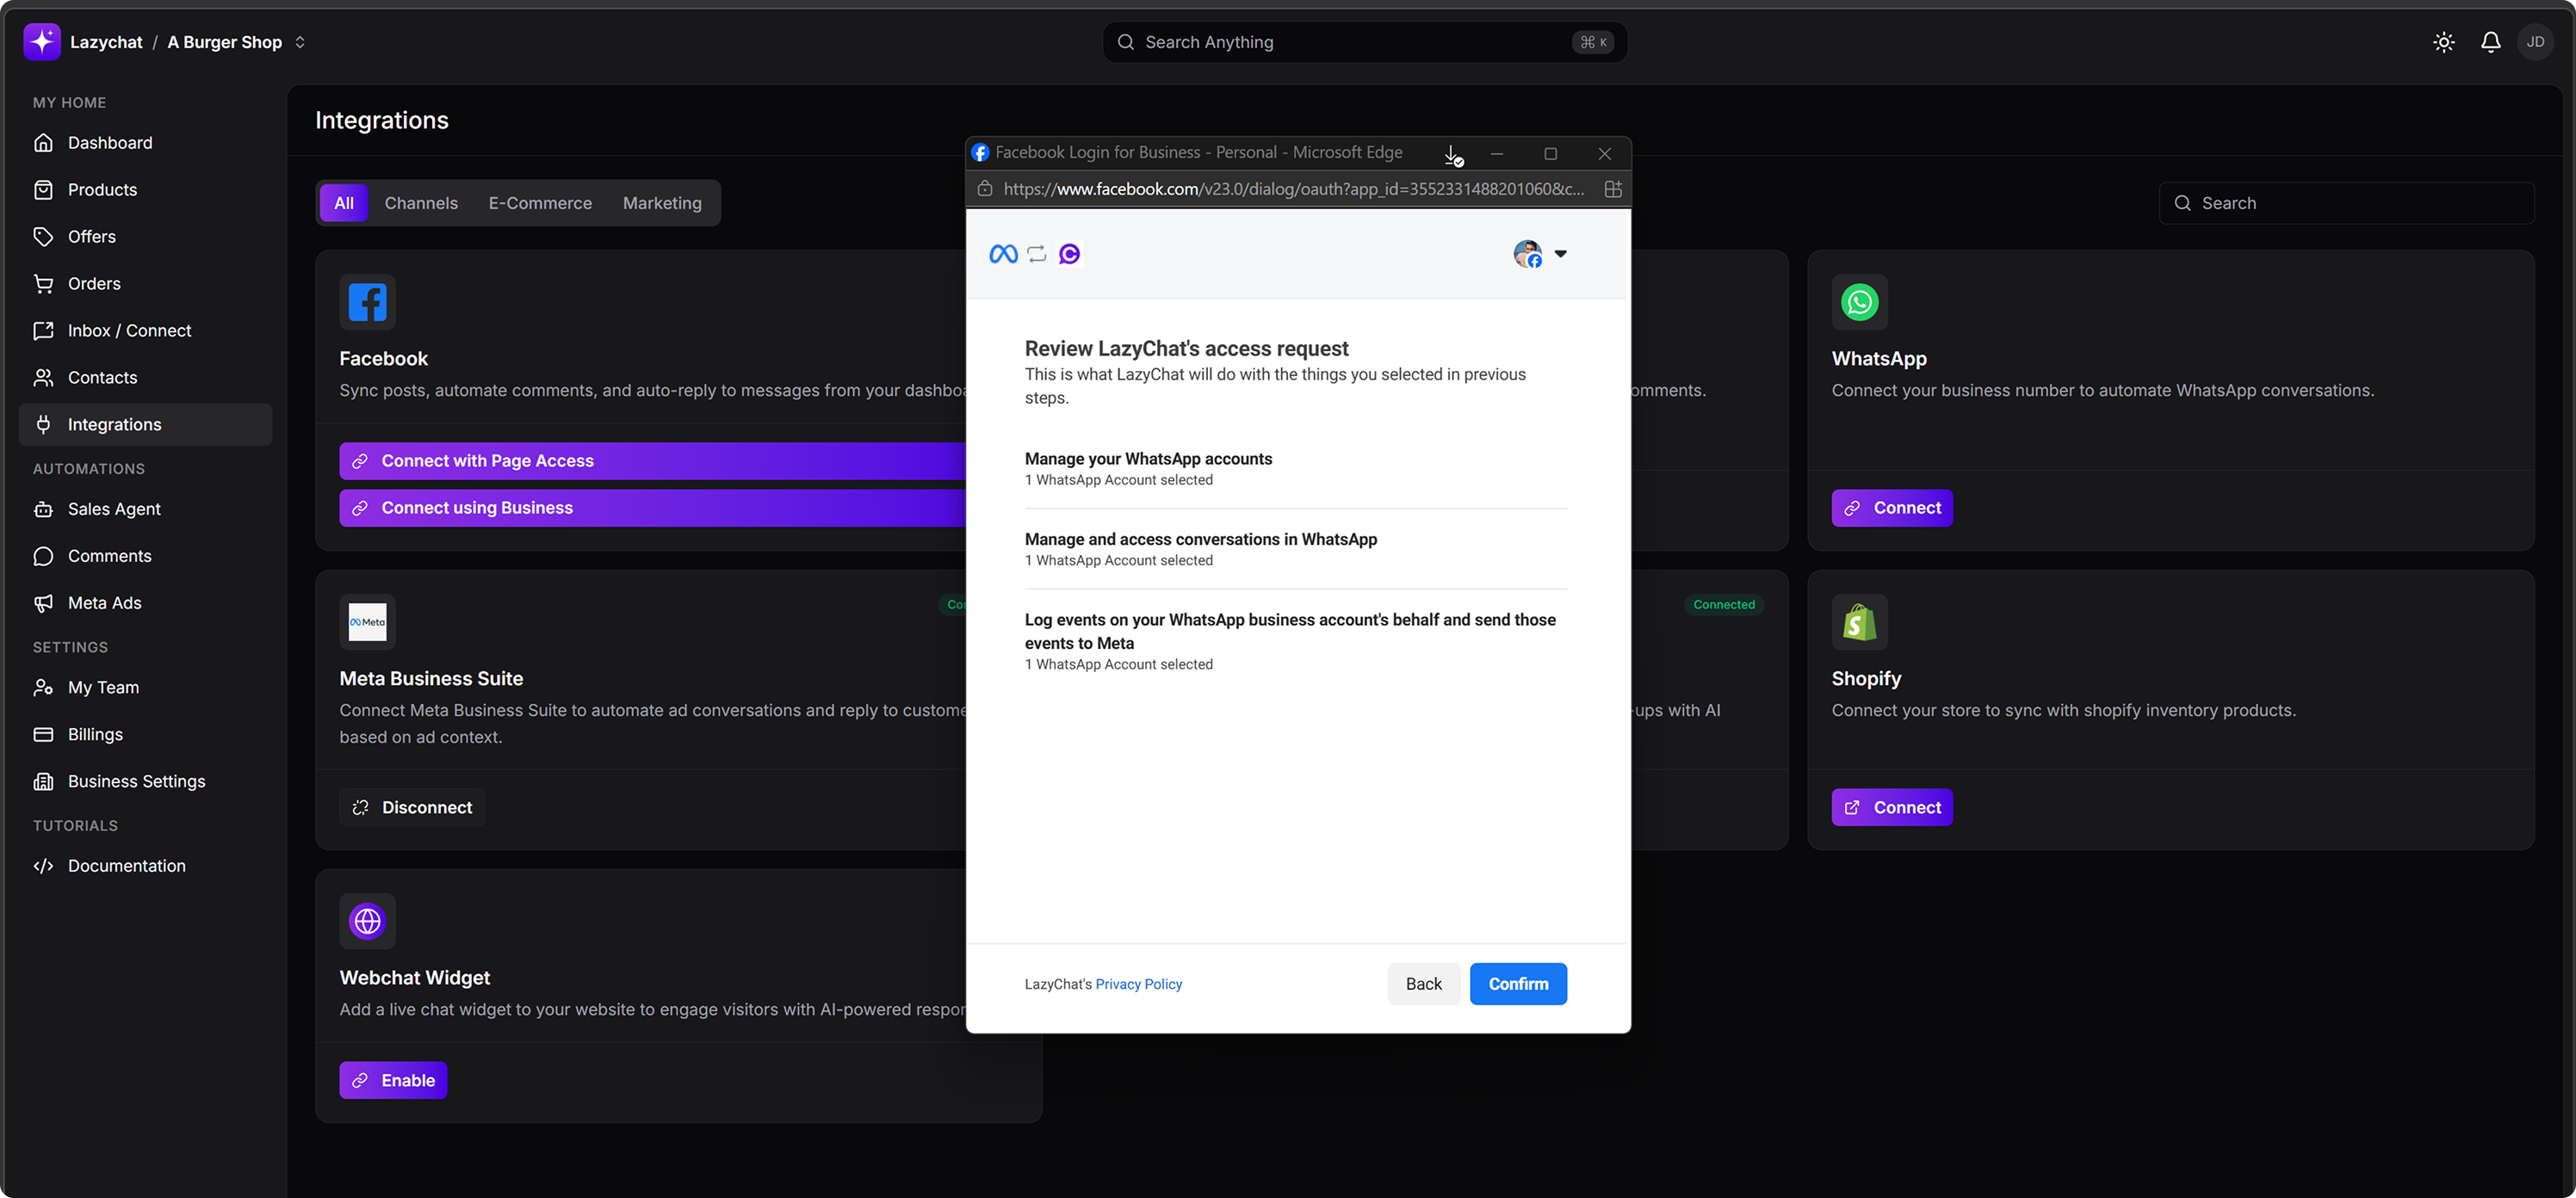 Review the requested permissions:
- Manage your WhatsApp accounts
- Manage and access conversations in WhatsApp
- Log events on your WhatsApp business accounts behalf and send those events to Meta
Click Confirm.
Step 10: Finish setup
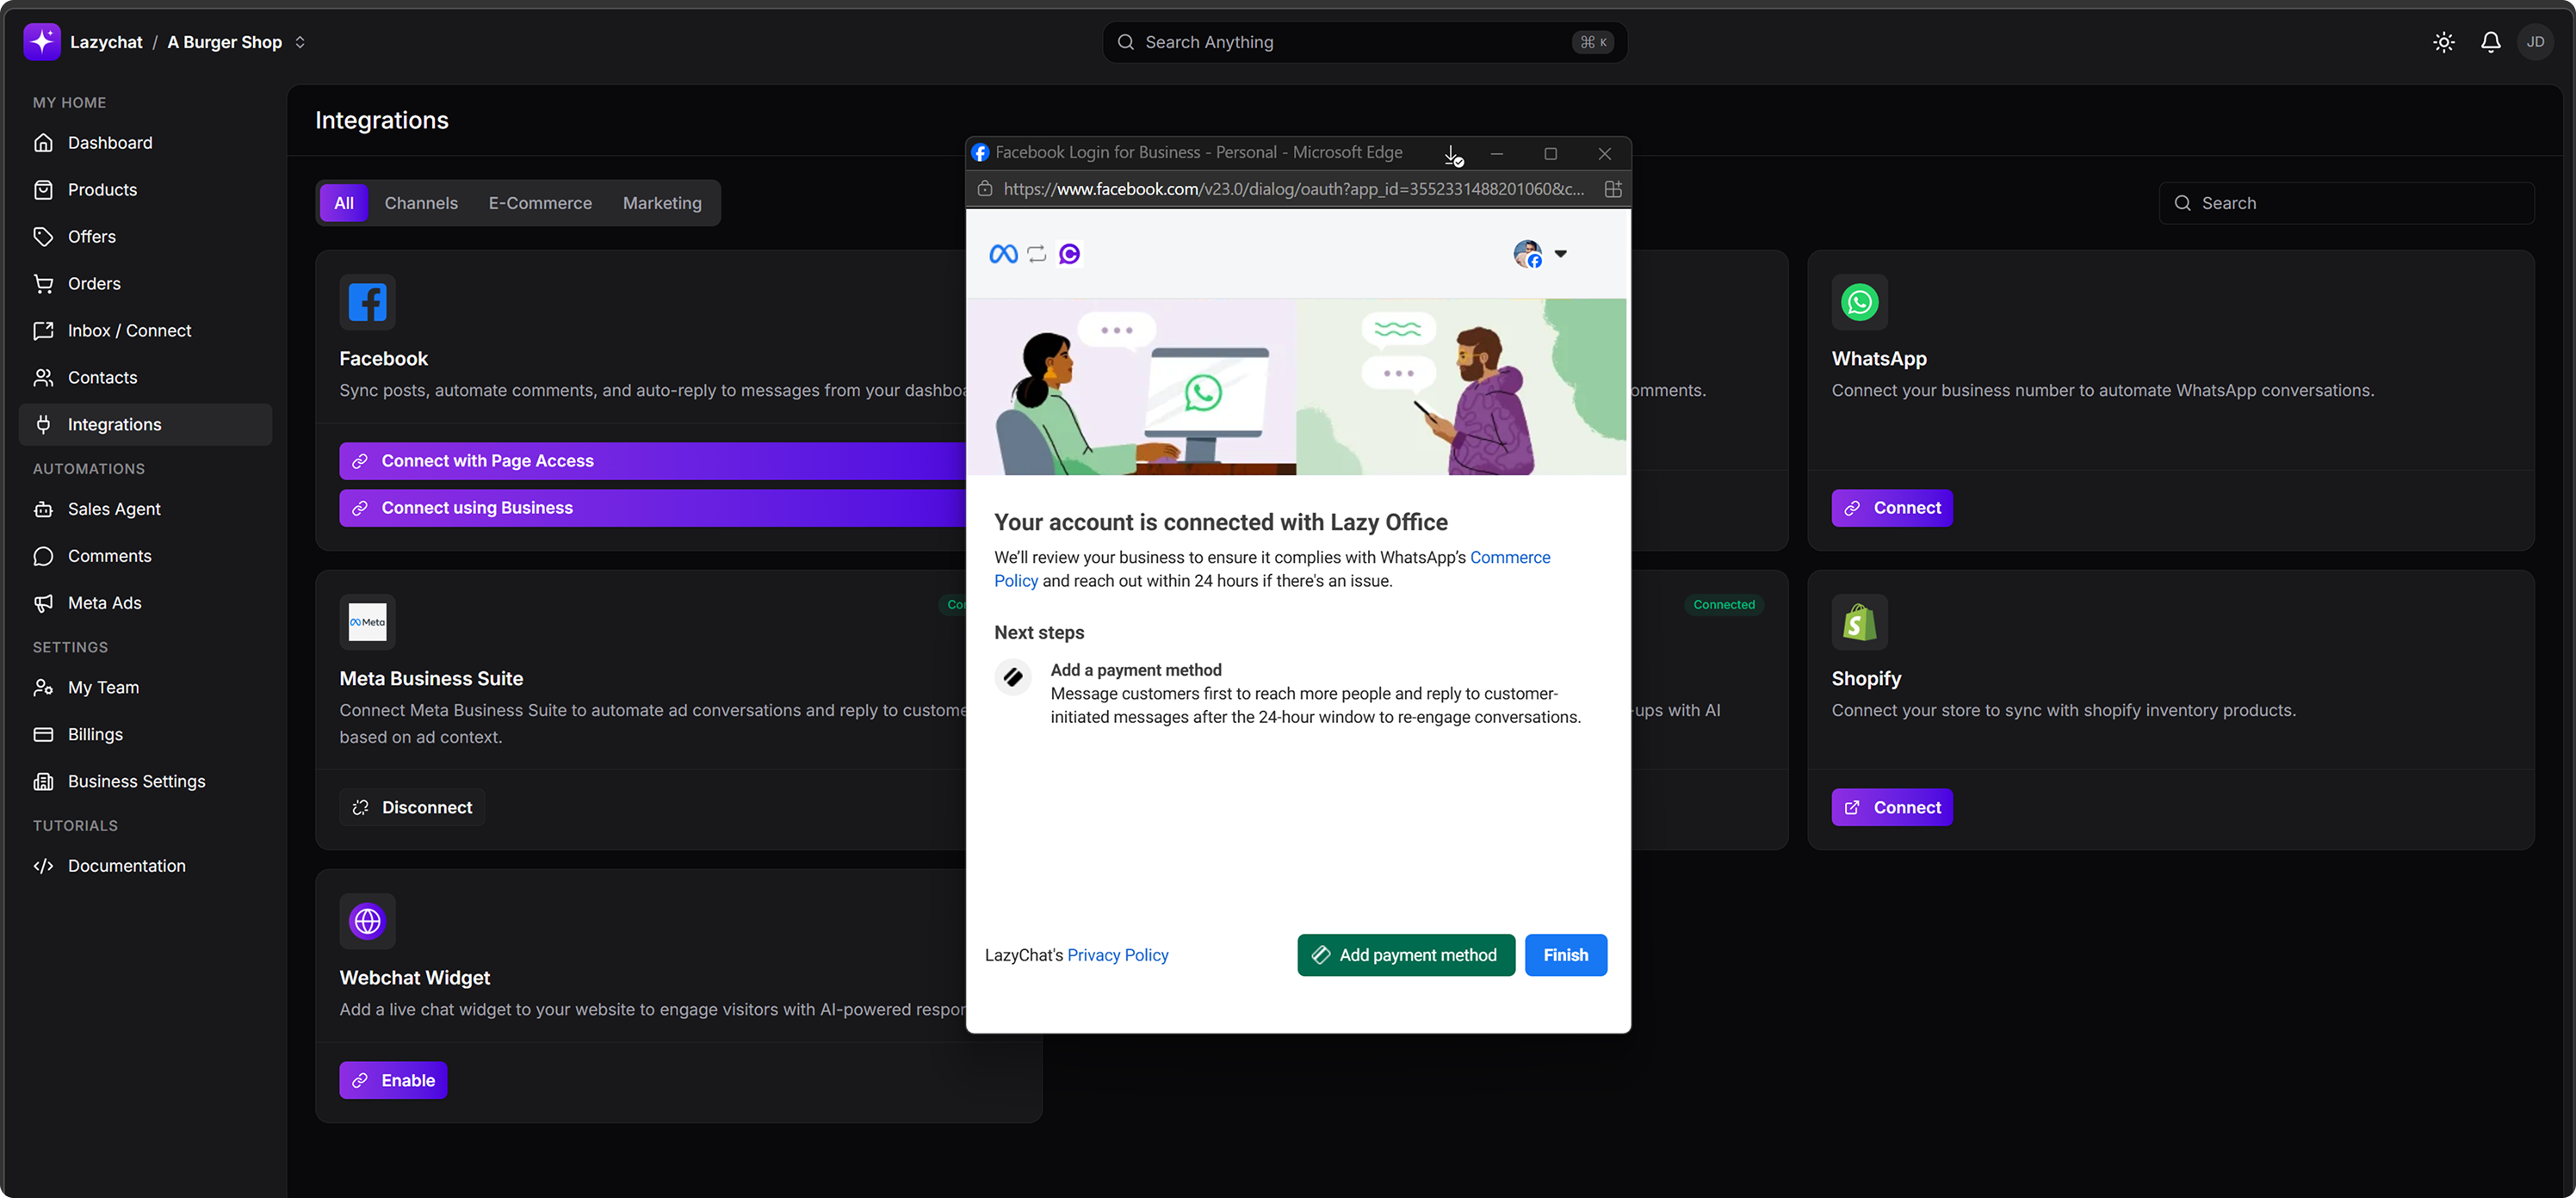 Once connected, you will see the confirmation screen:
Your account is connected with Lazy Office
Once connected, you will see the confirmation screen:
Your account is connected with Lazy Office
From here you can:
- Click Add payment method
- Or click Finish
Before You Connect
Before connecting WhatsApp Business with LazyChat, make sure all of the following are ready:
1. Active Meta Business Manager
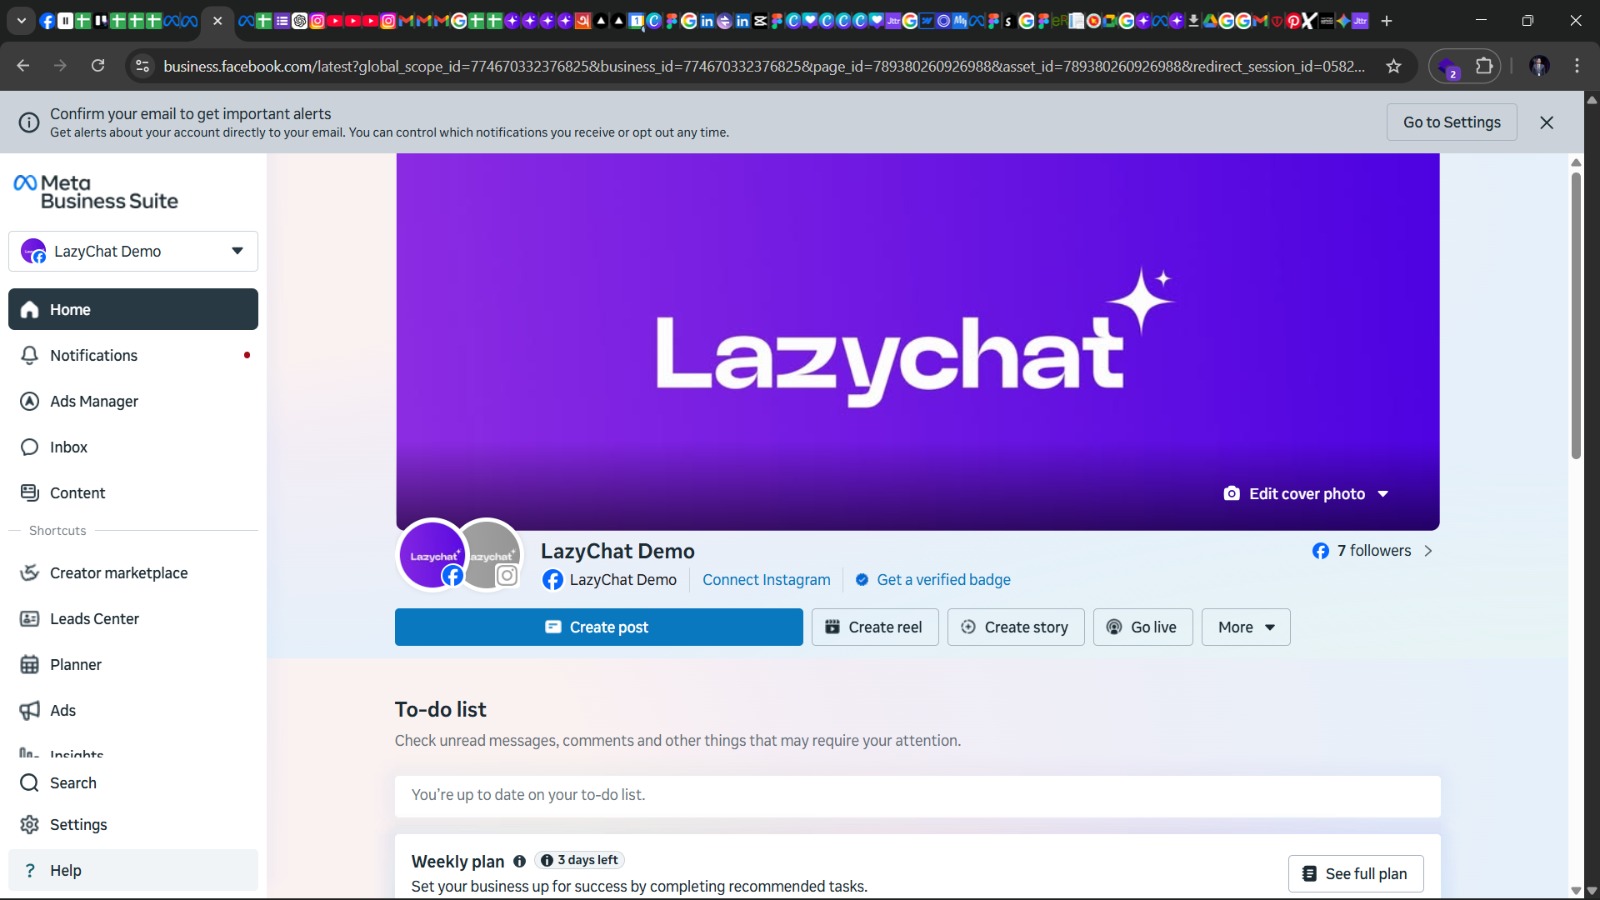
Go to Meta Business Suite and make sure the client has access to the correct Business Manager / Business Portfolio with admin rights.
2. Business Verification Completed and Account Quality Green

Go to Settings → Accounts → WhatsApp accounts → select your WABA → Summary and confirm:
- Business verification is Verified, not pending or rejected
- The account has no warnings, restrictions, or policy issues
3. WhatsApp Business Terms Accepted
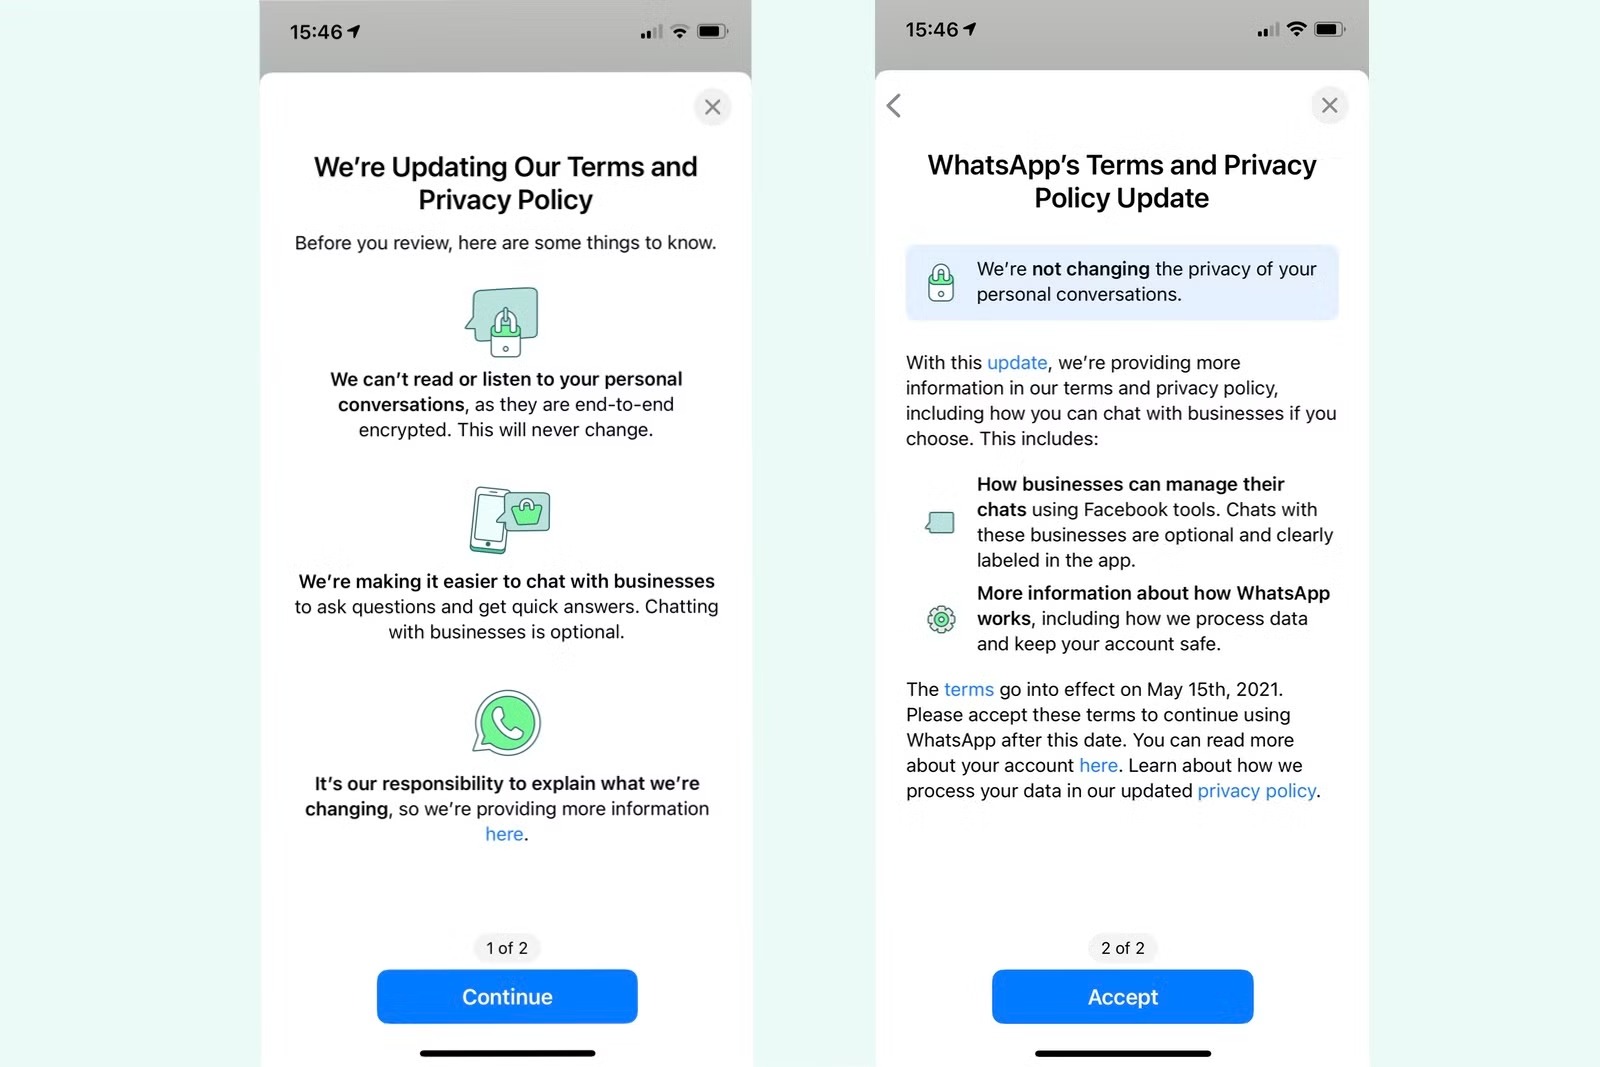
Make sure the WhatsApp Business Terms have already been accepted before starting the connection flow.
4. Valid WABA Available
Go to Settings → Accounts → WhatsApp accounts and make sure a WhatsApp Business Account (WABA) already exists and belongs to the verified business.
5. OTP Reachable
Make sure the phone number you want to connect can receive OTP by SMS or voice call during setup.
6. Legal Business Name Match
Check that the business name used in setup exactly matches the name in the official verification documents.
7. Display Name Ready
Prepare the WhatsApp display name in advance and make sure it follows WhatsApp naming guidelines for approval.
8. Clean Policy History and Business Eligibility
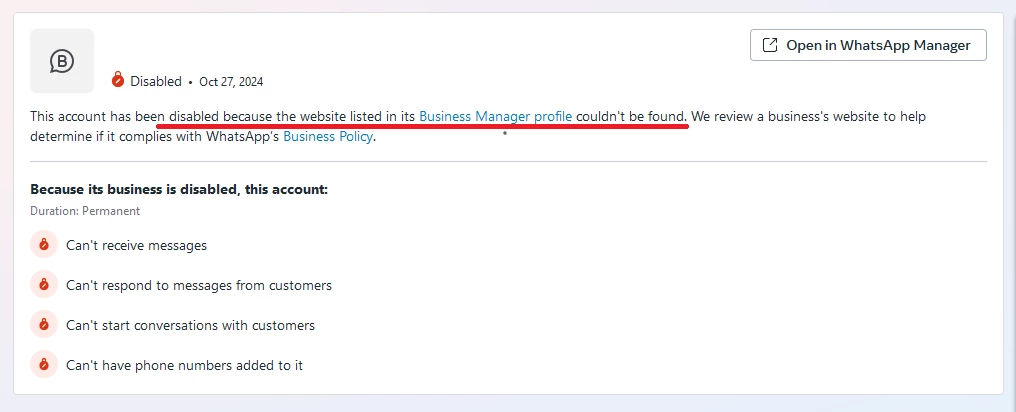
Check that the business and phone number have no previous WhatsApp policy violations, restrictions, or disabled status.
Also ensure the business type is eligible to use WhatsApp Business.
The following types of businesses are not allowed to use WhatsApp for commerce or automation:
- Adult products or services
- Body parts or fluids
- Alcohol or tobacco-related businesses
- Drugs, supplements, or medical products (restricted categories)
- Weapons, explosives, or harmful materials
- Gambling, betting, or lottery services
- Digital subscriptions, accounts, or virtual goods
- Currency, crypto, or financial scam-related services
- Any illegal, misleading, or deceptive business
Check the official WhatsApp Business Policy page before connecting.
Final Note
- Meta may review the business for compliance with WhatsApp's Commerce Policy
- If there is any issue, Meta may reach out within 24 hours